

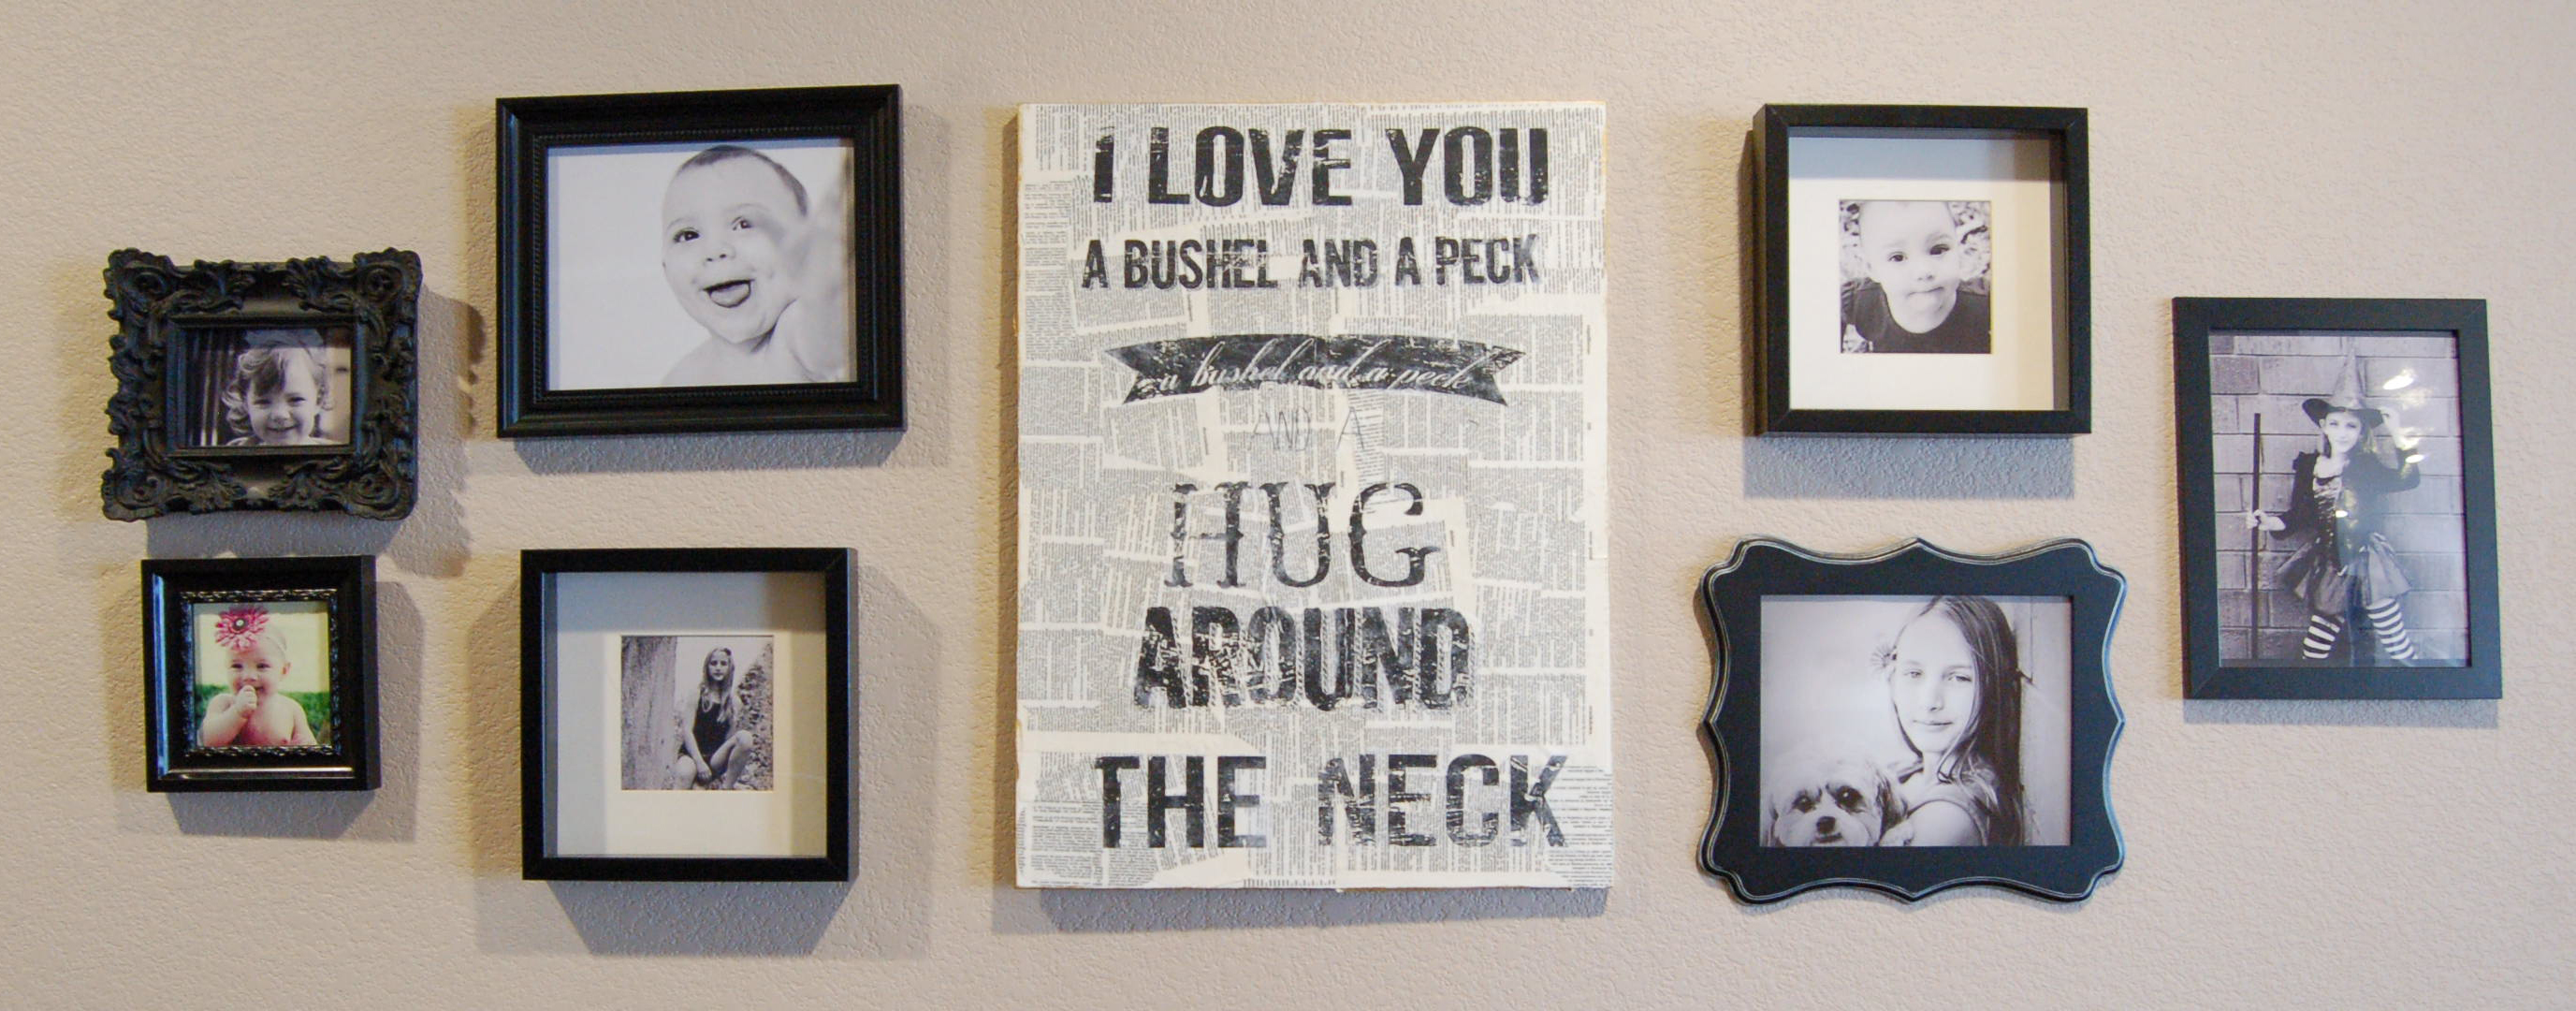
We moved into our new house a year and a half ago and I am still struggling to put stuff up on the walls. We have an abnormally HUGE entry/hallway – think bowling alley. Yes, that big. The girls do cartwheels and slip-n-slide in their socks, Risky Business style. I don’t think we will ever be able to put furniture in there. Anyway, I am having to come up with easy, cheap and creative ways to fill them up. I really want to paint something on a super big canvas someday, but that’s not happening anytime soon. This was a project I did a while ago and it was super easy and inexpensive.

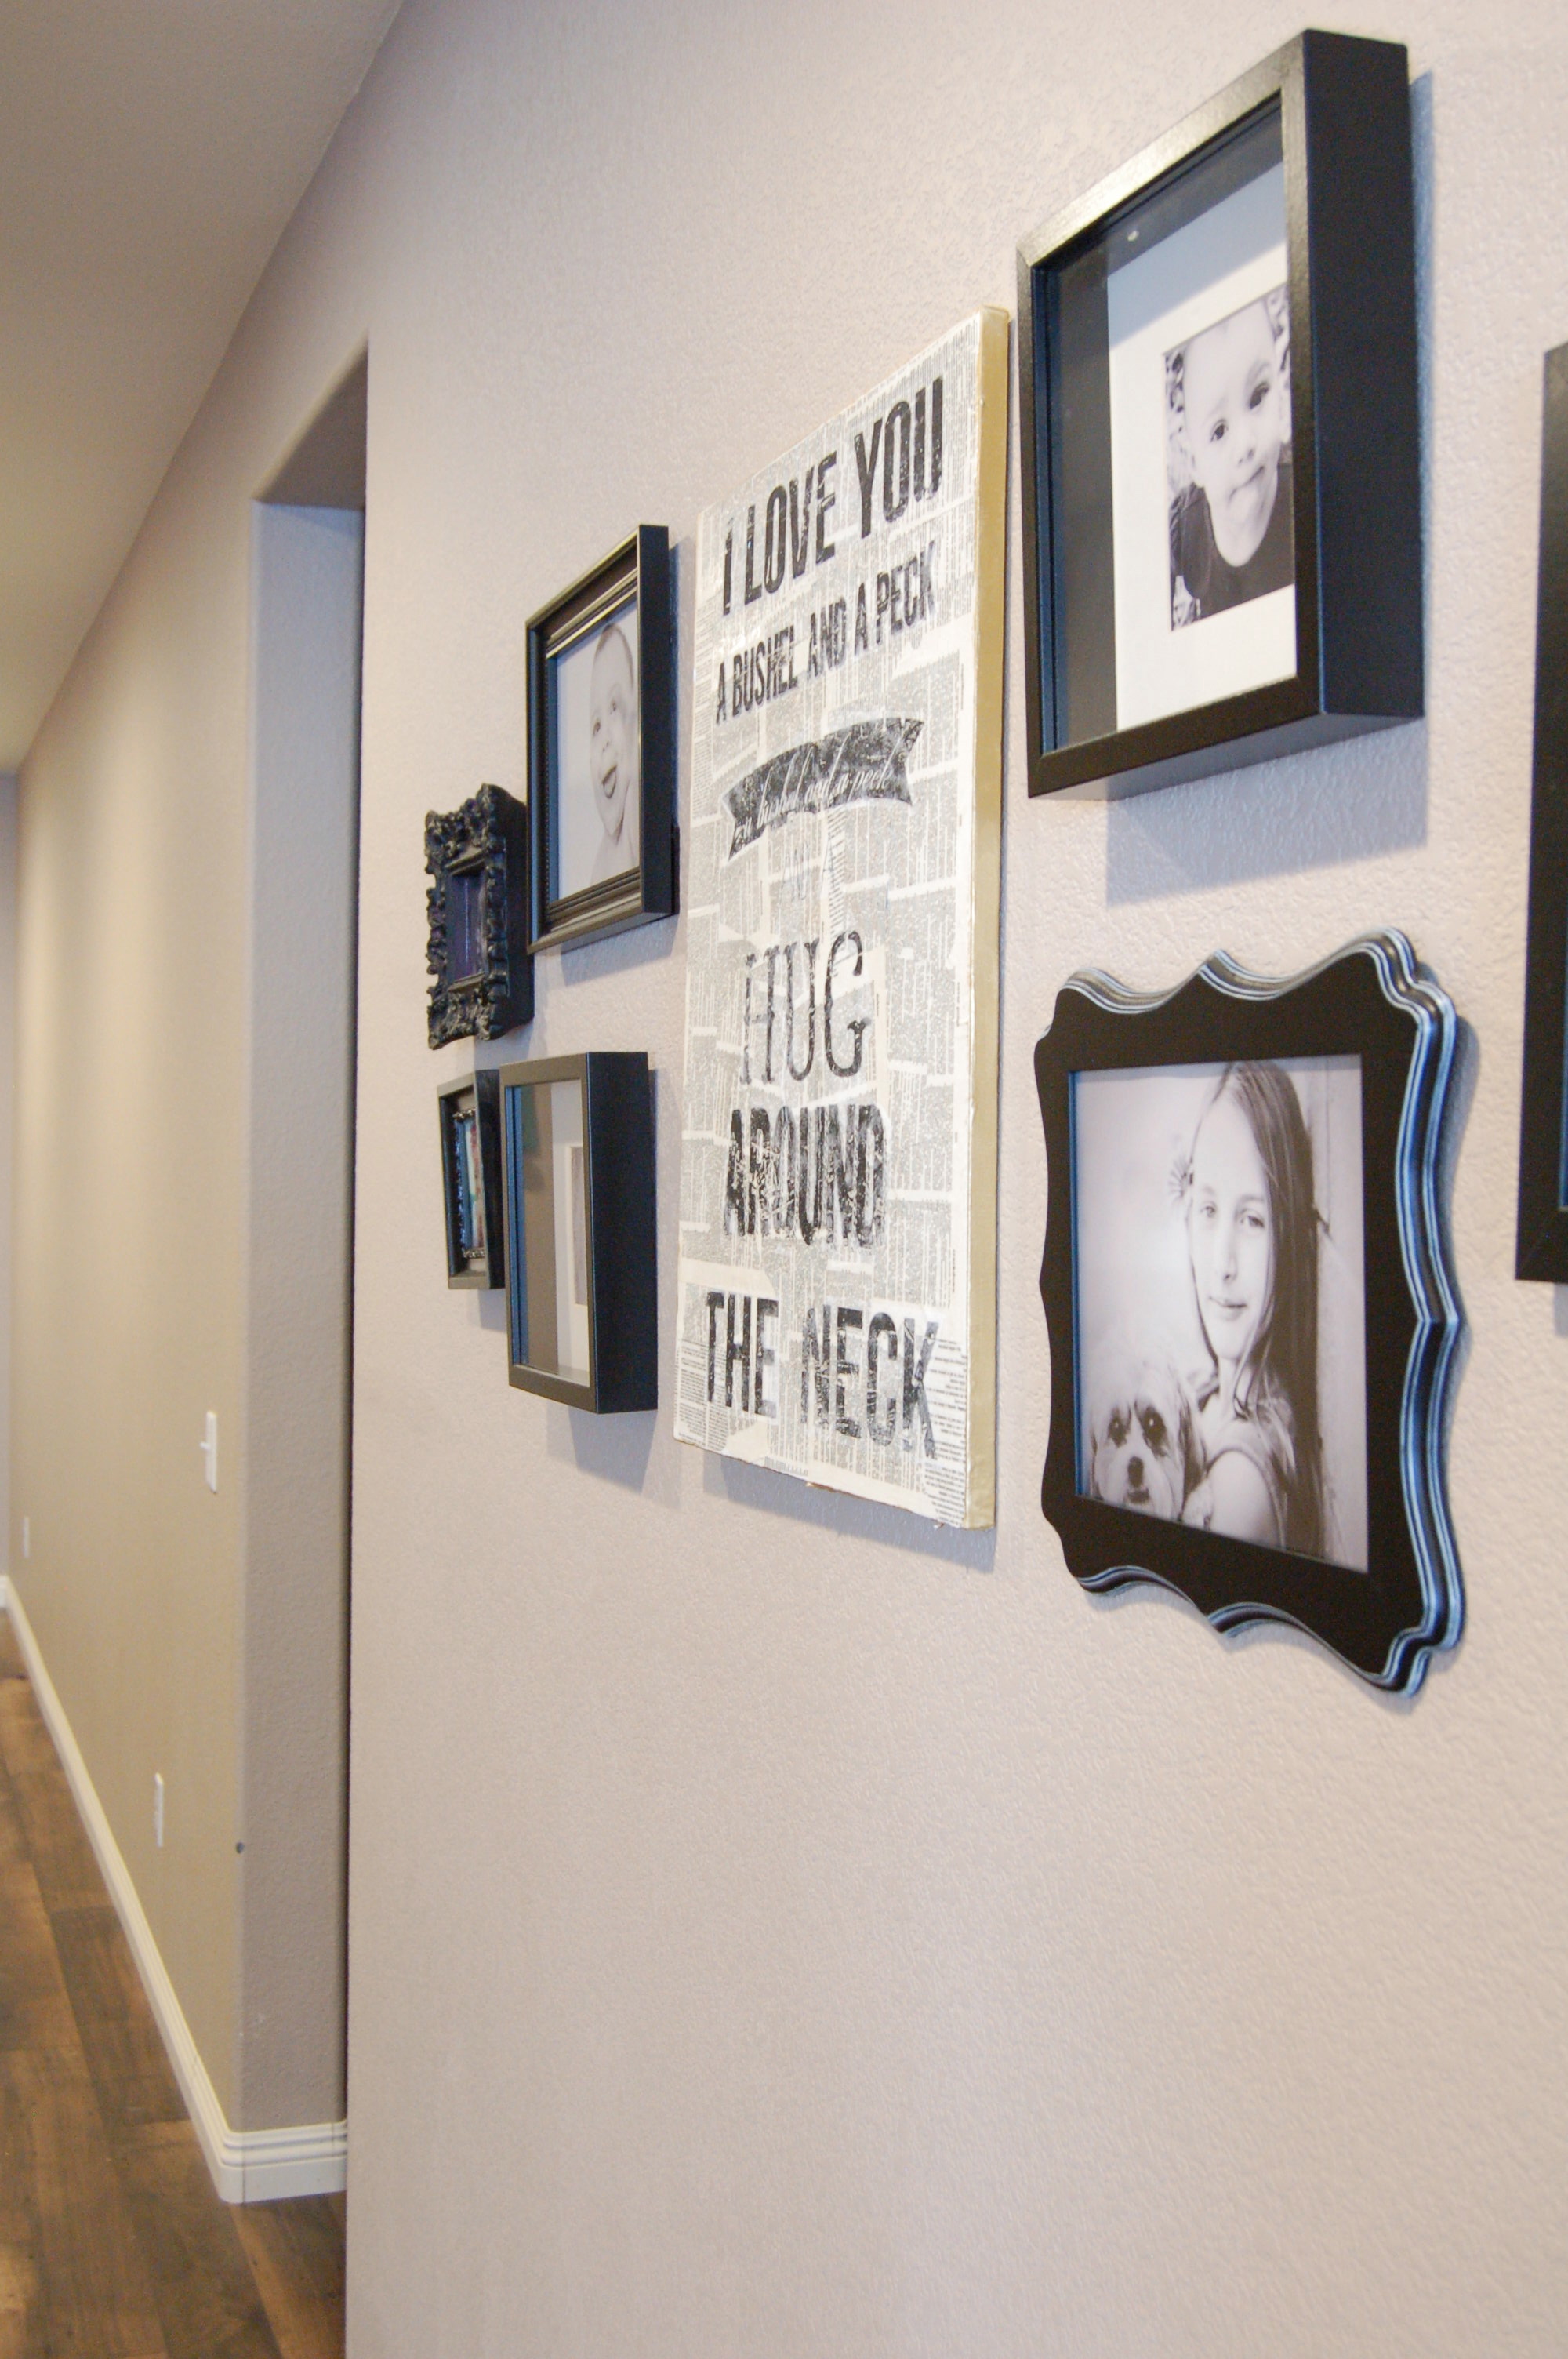
See, I told you I have big walls to fill.
All you need is:
White canvas or even an old canvas that you can cover up
Some old dictionary papers
A quote printed out and reverse image on a laser printer (toner not ink)
Mod Podge
Foam brush
Spray bottle with water (or a bowl with water)
Old Washcloth
1. Start off by ripping out a bunch of pages out of an old dictionary or book and using Mod Podge to glue them onto the canvas and overlap to make sure all the white of the canvas is covered completely or to your liking. You can also cover the sides, unless you plan on framing this after you’re done. I just hung mine up without a frame and painted the edges gold. After you apply all the papers you want, apply another thin coat of Mod Podge and wait for this to dry a couple of days.
2. Meanwhile, find a quote, picture or whatever strikes you and print it out on a laser printer using the cheapest paper you have. My grandma used to sing this song to me when I was little so it’s one of my favorites. Remember to reverse the image before printing because we will be laying it printed side down on the canvas. My canvas was 16×20, so I started in Photoshop with a 16×20 blank background and typed in my quote and made sure it all fit like this:

Next, had to figure out how to print everything out onto 8.5×11 paper so this means breaking up the image into 8.5×11 sections. My printer settings will let me pick sections to print but I had to select the button that says,”Print Selected Area”, like this:

After that section prints, you will need to move it over to the next section. Make sure you overlap a little of what you already printed like this:

Make sure the “Print Selected Area” is checked again. Repeat the next 2 sections on the bottom part until the whole thing is printed.
3. This is where it got a little tricky for me and wish I had taken pictures of how I did it now. I had to “puzzle piece” together all the printed sections. There will be margins on the outside of each paper that you will need to cut off. Lay all the sections printed side up and cut the paper until everything lines up. I taped mine because in the next step you will need to lay it down and it helps if everything is in one piece.
4. With the foam brush, apply a layer of Mod Podge to the canvas. Before it dries, start laying down your printed pages, printed side down onto the canvas. Be sure everything is lined up because it will not come off once you lay it down. No pressure! Ha Smooth it out with your hand and let sit for a few minutes.
5. Take a spray bottle and lightly spray a little section, start small or dampen your washcloth in a bowl of water. Use your washcloth to start rubbing away the paper. It will ball up and come off leaving the black image on the canvas. Don’t rub too hard because the black can come off. Some of mine did, but I wanted the distressed look so I didn’t mind. You might need to let a section dry and come back to it later if it starts rubbing off too much. You can also go back and fill in any areas with paint or a sharpie if you want a sharper look.
6. After all the white paper is removed, let it dry for a few days then add another layer of Mod Podge if you like.
The first time I attempted a project using the same technique, I painted the background a dark grey color and used a brown color for the State of California. This one I actually used an already painted canvas and just painted over it. Didn’t work so well, but I kind of like how it came out in the end. It covers up the cord to my wax pot scent thingy, so it serves a purpose. So, white/light backgrounds work best for this project.

Here’s the files for download if you would like. Please note there are reverse images as well. You can just print them out and frame them as is if you want.
I will even throw in the files for the California project. Super easy.
