Christmas Gift Tags courtesy of Clark & Cousin Eddie

I realize it’s been like 6 months since I posted anything.  A full time job will do that to a blog.  I wish I had more time to make fun stuff like this.

So, I was looking for printable gift tags on Pinterest the other day.  I really didn’t want any cutesy ones this year and I came across some that had Christmas movie quotes on them.  But none of the quotes were from my favorite Christmas movie in the whole history of Christmas movies…Christmas Vacation!  I had to remedy this and below is the result.

Christmas Vacation Gift Tags 1 Christmas Vacation Gift Tags 2

I printed them out on regular copy paper and cut them out.

image3-1

I cut strips of card stock and glued the quotes onto them and cut the corners.

image4

Then I punched holes in the top of all them. And now they will be attached to my packages.  Well, maybe not all of them, some are not appropriate for children 😉  I suddenly have the urge to go watch this movie now.  I hear Cousin Eddie calling…

You can download them here:

Gift Tags 1

Gift Tags 2 

Merry Christmas!

Wall Decor on a Budget

We moved into our new house a year and a half ago and I am still struggling to put stuff up on the walls.  We have an abnormally HUGE entry/hallway – think bowling alley.  Yes, that big.  The girls do cartwheels and slip-n-slide in their socks, Risky Business style.  I don’t think we will ever be able to put furniture in there.  Anyway, I am having to come up with easy, cheap and creative ways to fill them up.  I really want to paint something on a super big canvas someday, but that’s not happening anytime soon.  This was a project I did a while ago and it was super easy and inexpensive.

IMG_7303
DSC_0128


See, I told you I have big walls to fill.

All you need is:

White canvas or even an old canvas that you can cover up
Some old dictionary papers
A quote printed out and reverse image on a laser printer (toner not ink)
Mod Podge
Foam brush
Spray bottle with water (or a bowl with water)
Old Washcloth

1.  Start off by ripping out a bunch of pages out of an old dictionary or book and using Mod Podge to glue them onto the canvas  and overlap to make sure all the white of the canvas is covered completely or to your liking.  You can also cover the sides, unless you plan on framing this after you’re done.  I just hung mine up without a frame and painted the edges gold.  After you apply all the papers you want, apply another thin coat of Mod Podge and wait for this to dry a couple of days.

2.  Meanwhile, find a quote, picture or whatever strikes you and print it out on a laser printer using the cheapest paper you have.  My grandma used to sing this song to me when I was little so it’s one of my favorites.  Remember to reverse the image before printing because we will be laying it printed side down on the canvas.  My canvas was 16×20, so I started in Photoshop with a 16×20 blank background and typed in my quote and made sure it all fit like this:

Screen Shot 2014-05-20 at 11.31.03 AM

Next, had to figure out how to print everything out onto 8.5×11 paper so this means breaking up the image into 8.5×11 sections.  My printer settings will let me pick sections to print but I had to select the button that says,”Print Selected Area”, like this:

Screen Shot 2014-05-20 at 11.51.46 AM

After that section prints, you will need to move it over to the next section.  Make sure you overlap a little of what you already printed like this:

Screen Shot 2014-05-20 at 11.52.04 AM
Make sure the “Print Selected Area” is checked again.  Repeat the next 2 sections on the bottom part until the whole thing is printed.

3.  This is where it got a little tricky for me and wish I had taken pictures of how I did it now.  I had to “puzzle piece” together all the printed sections.  There will be margins on the outside of each paper that you will need to cut off.  Lay all the sections printed side up and cut the paper until everything lines up.  I taped mine because in the next step you will need to lay it down and it helps if everything is in one piece.

4.  With the foam brush, apply a layer of Mod Podge to the canvas.  Before it dries, start laying down your printed pages, printed side down onto the canvas.  Be sure everything is lined up because it will not come off once you lay it down.  No pressure! Ha  Smooth it out with your hand and let sit for a few minutes.

5. Take a spray bottle and lightly spray a little section, start small or dampen your washcloth in a bowl of water.  Use your washcloth to start rubbing away the paper.  It will ball up and come off leaving the black image on the canvas.  Don’t rub too hard because the black can come off.  Some of mine did, but I wanted the distressed look so I didn’t mind.  You might need to let a section dry and come back to it later if it starts rubbing off too much.  You can also go back and fill in any areas with paint or a sharpie if you want a sharper look.

6.  After all the white paper is removed, let it dry for a few days then add another layer of Mod Podge if you like.

DSC_0130

The first time I attempted a project using the same technique, I painted the background a dark grey color and used a brown color for the State of California.  This one I actually used an already painted canvas and just painted over it.  Didn’t work so well, but I kind of like how it came out in the end.  It covers up the cord to my wax pot scent thingy, so it serves a purpose. So, white/light backgrounds work best for this project.

DSC_0135


Here’s the files for download if you would like.  Please note there are reverse images as well.  You can just print them out and frame them as is if you want.

8.5 x 11

8.5 x 11 Reverse

16×20

16×20 Reverse

I will even throw in the files for the California project.  Super easy.

So Cal Love

So Cal Love Reverse

Nor Cal Love

Nor Cal Love Reverse


40th Anniversary Party | Part Two of Three

This is the post about all the decorations we made for my parents 40th Anniversary Party.

As I said in my previous post, everything we made fit into our suitcases and carry-on’s.  My niece and I made a secret board on Pinterest where we could share ideas about the vision we had for this party because really, we didn’t have any parameters.  It was like planning a mini wedding and the bride had no idea she was getting married.  Surprise!

My niece and I started to make a plan as to who was making what and then one weekend we had a massive crafting day.  We busted out her Silhouette Cameo and put that thing to work.  Seriously, I love that thing and I’m so glad she doesn’t have any room in her place to store it and I have to keep it at my house 🙂  We decided that we wanted to do an ombre theme in shades of aqua blue.

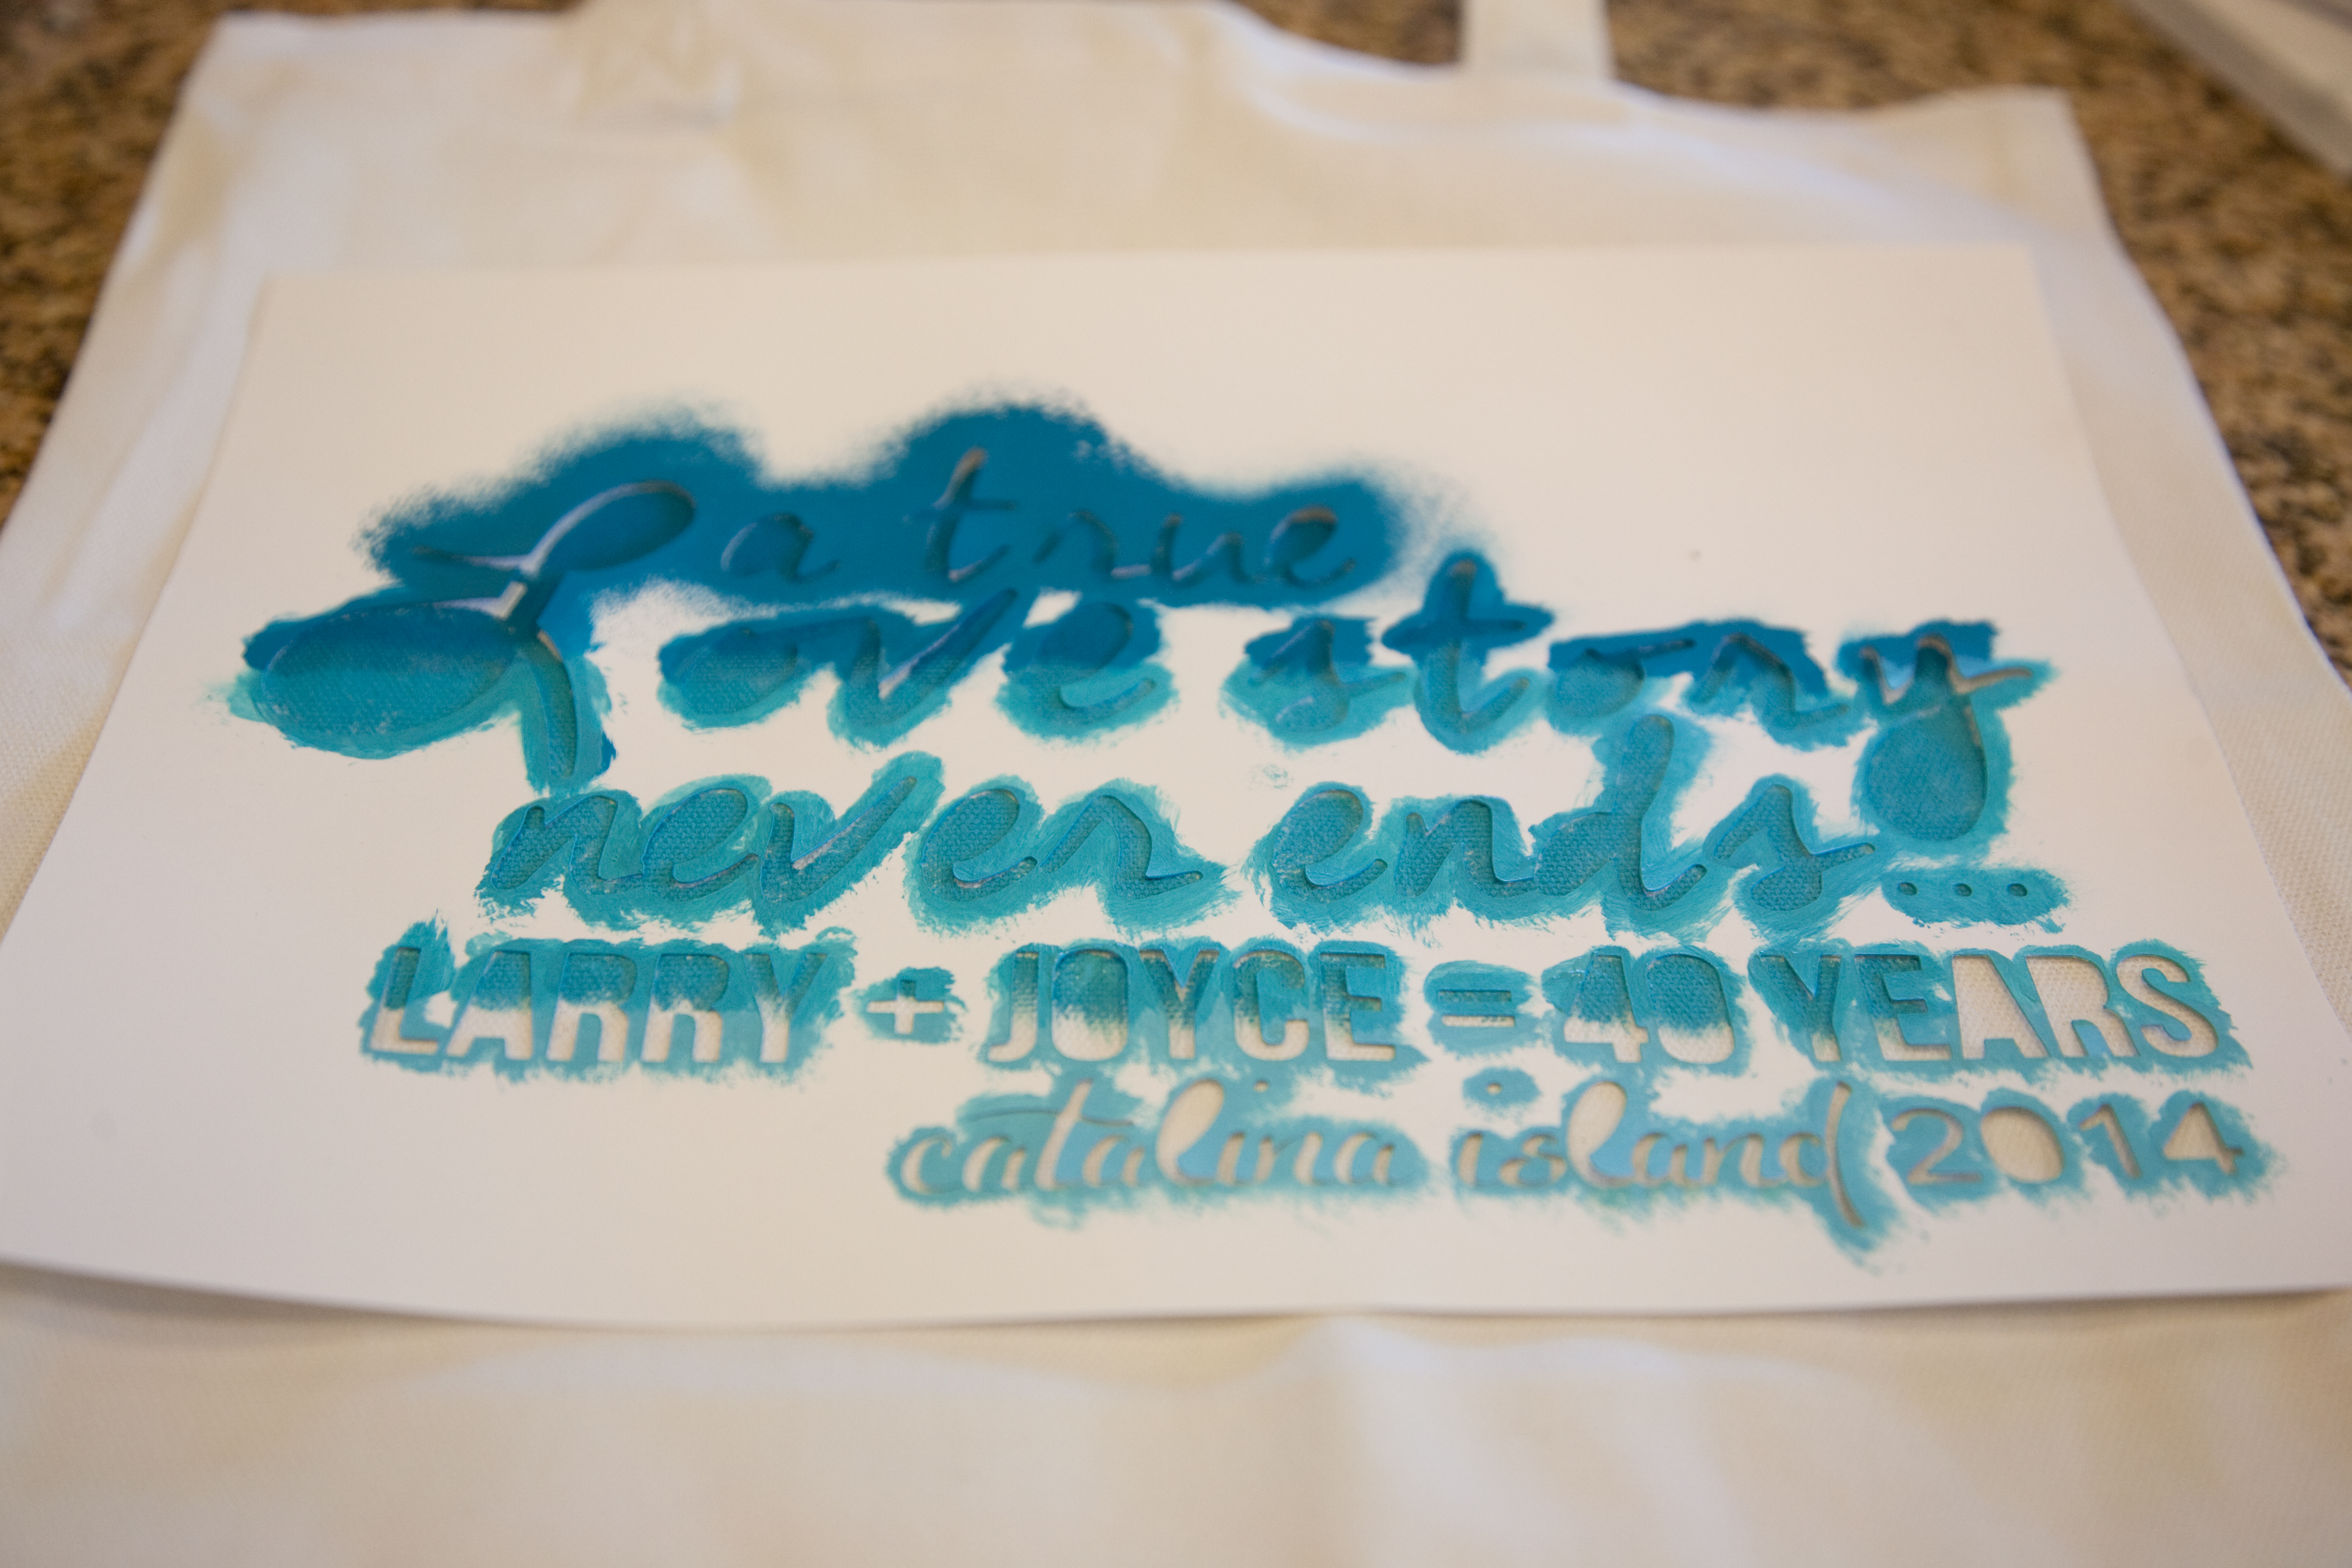
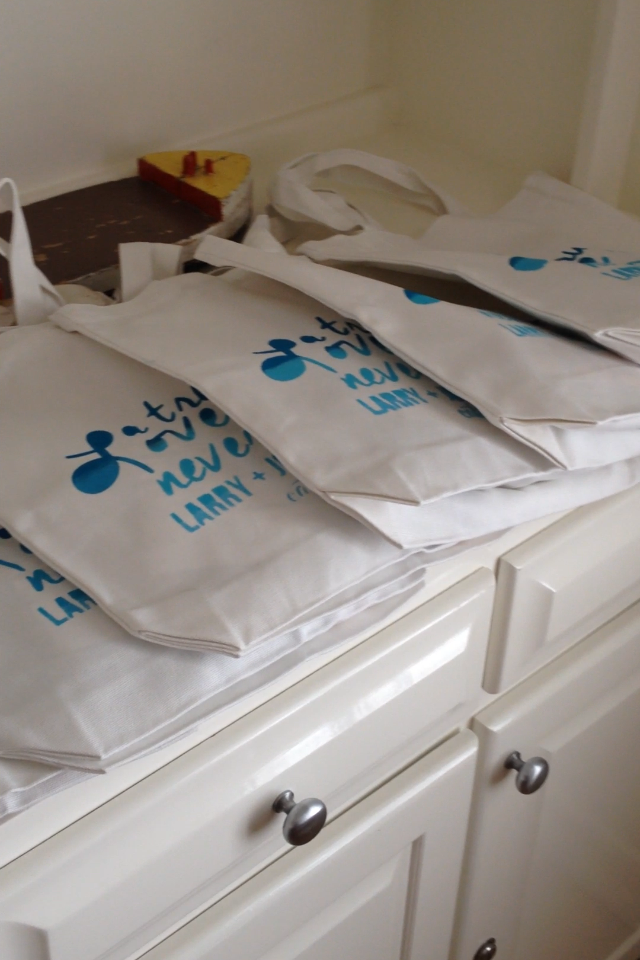
First thing we made were these welcome bags for the guests for the hotel rooms. We cut out the saying, “A true love story never ends” on the Silhouette and used it as a stencil to paint on the white canvas bags.  We filled the bags with snacks, water, sunblock, kleenex and a map of Catalina.

IMG_7299  photo

Next, are the triangular frames that were the center of the table.  I bought Dollar Store frames, took out the back and the glass and painted them in Martha Stewart Blue Chalkboard Paint.  I then printed 4×6 photos in black and white onto Vellum paper.  These we assembled on the island so I brought my glue gun and just glued the corners together when I got there.  We put a votive candle inside each one and it was really pretty at night all lit up.

IMG_7480 copy

The little metal buckets we found in the Dollar Spot at Target during Valentines Day and I spray painted them silver.  I used the Silhouette again to cut out the 40’s and the Frames behind them.  The flowers were originally supposed to be just blue carnations but they weren’t as big as I had hoped so I had to go foraging outside our hotel for greenery.  Luckily, I found some Alstroemeria in a pot outside and something that resembled Cilantro.  But ooopsy, I didn’t even think to check if those buckets were water tight….NOOOOOPE.  My McGiver skills kicked in.  I thought about hot gluing the inside – couldn’t get my glue gun inside.  Next.  Maybe some caulking, I saw a hardware store somewhere on the island.  Hmmm, then my sister had the idea of sandwich baggies.  So I sent my nephew to the store to get some.  He returned with a box of 300 sandwich baggies that cost $5.00.  Seriously? Everything is SOOOO expensive over there.  Anyway, I managed to get all the flowers into baggies with water and that seemed to work.

IMG_7406 copy

The “BROWN” letters were found in the cheap section at Michaels.  We painstakingly painted those suckers in ombre blue.  They came out AWESOME!  My niece designed and painted the invitation and we attached it to a frame because after all my mom had no idea this was even happening and she never got to see the invitation.

My dad kept coming to us with quotes and sayings and asking us to incorporate them somehow.  All we said was yes and then had to figure out how to do something with them.  One of the quotes was, “If you want a place in the sun, you have to expect some blisters.”  I decided I just could not make anything else last minute so I whipped up a digital scrapbook layout that we could display and then my parents could frame it and hang it on their wall later.

blistersinthesun_edited-1

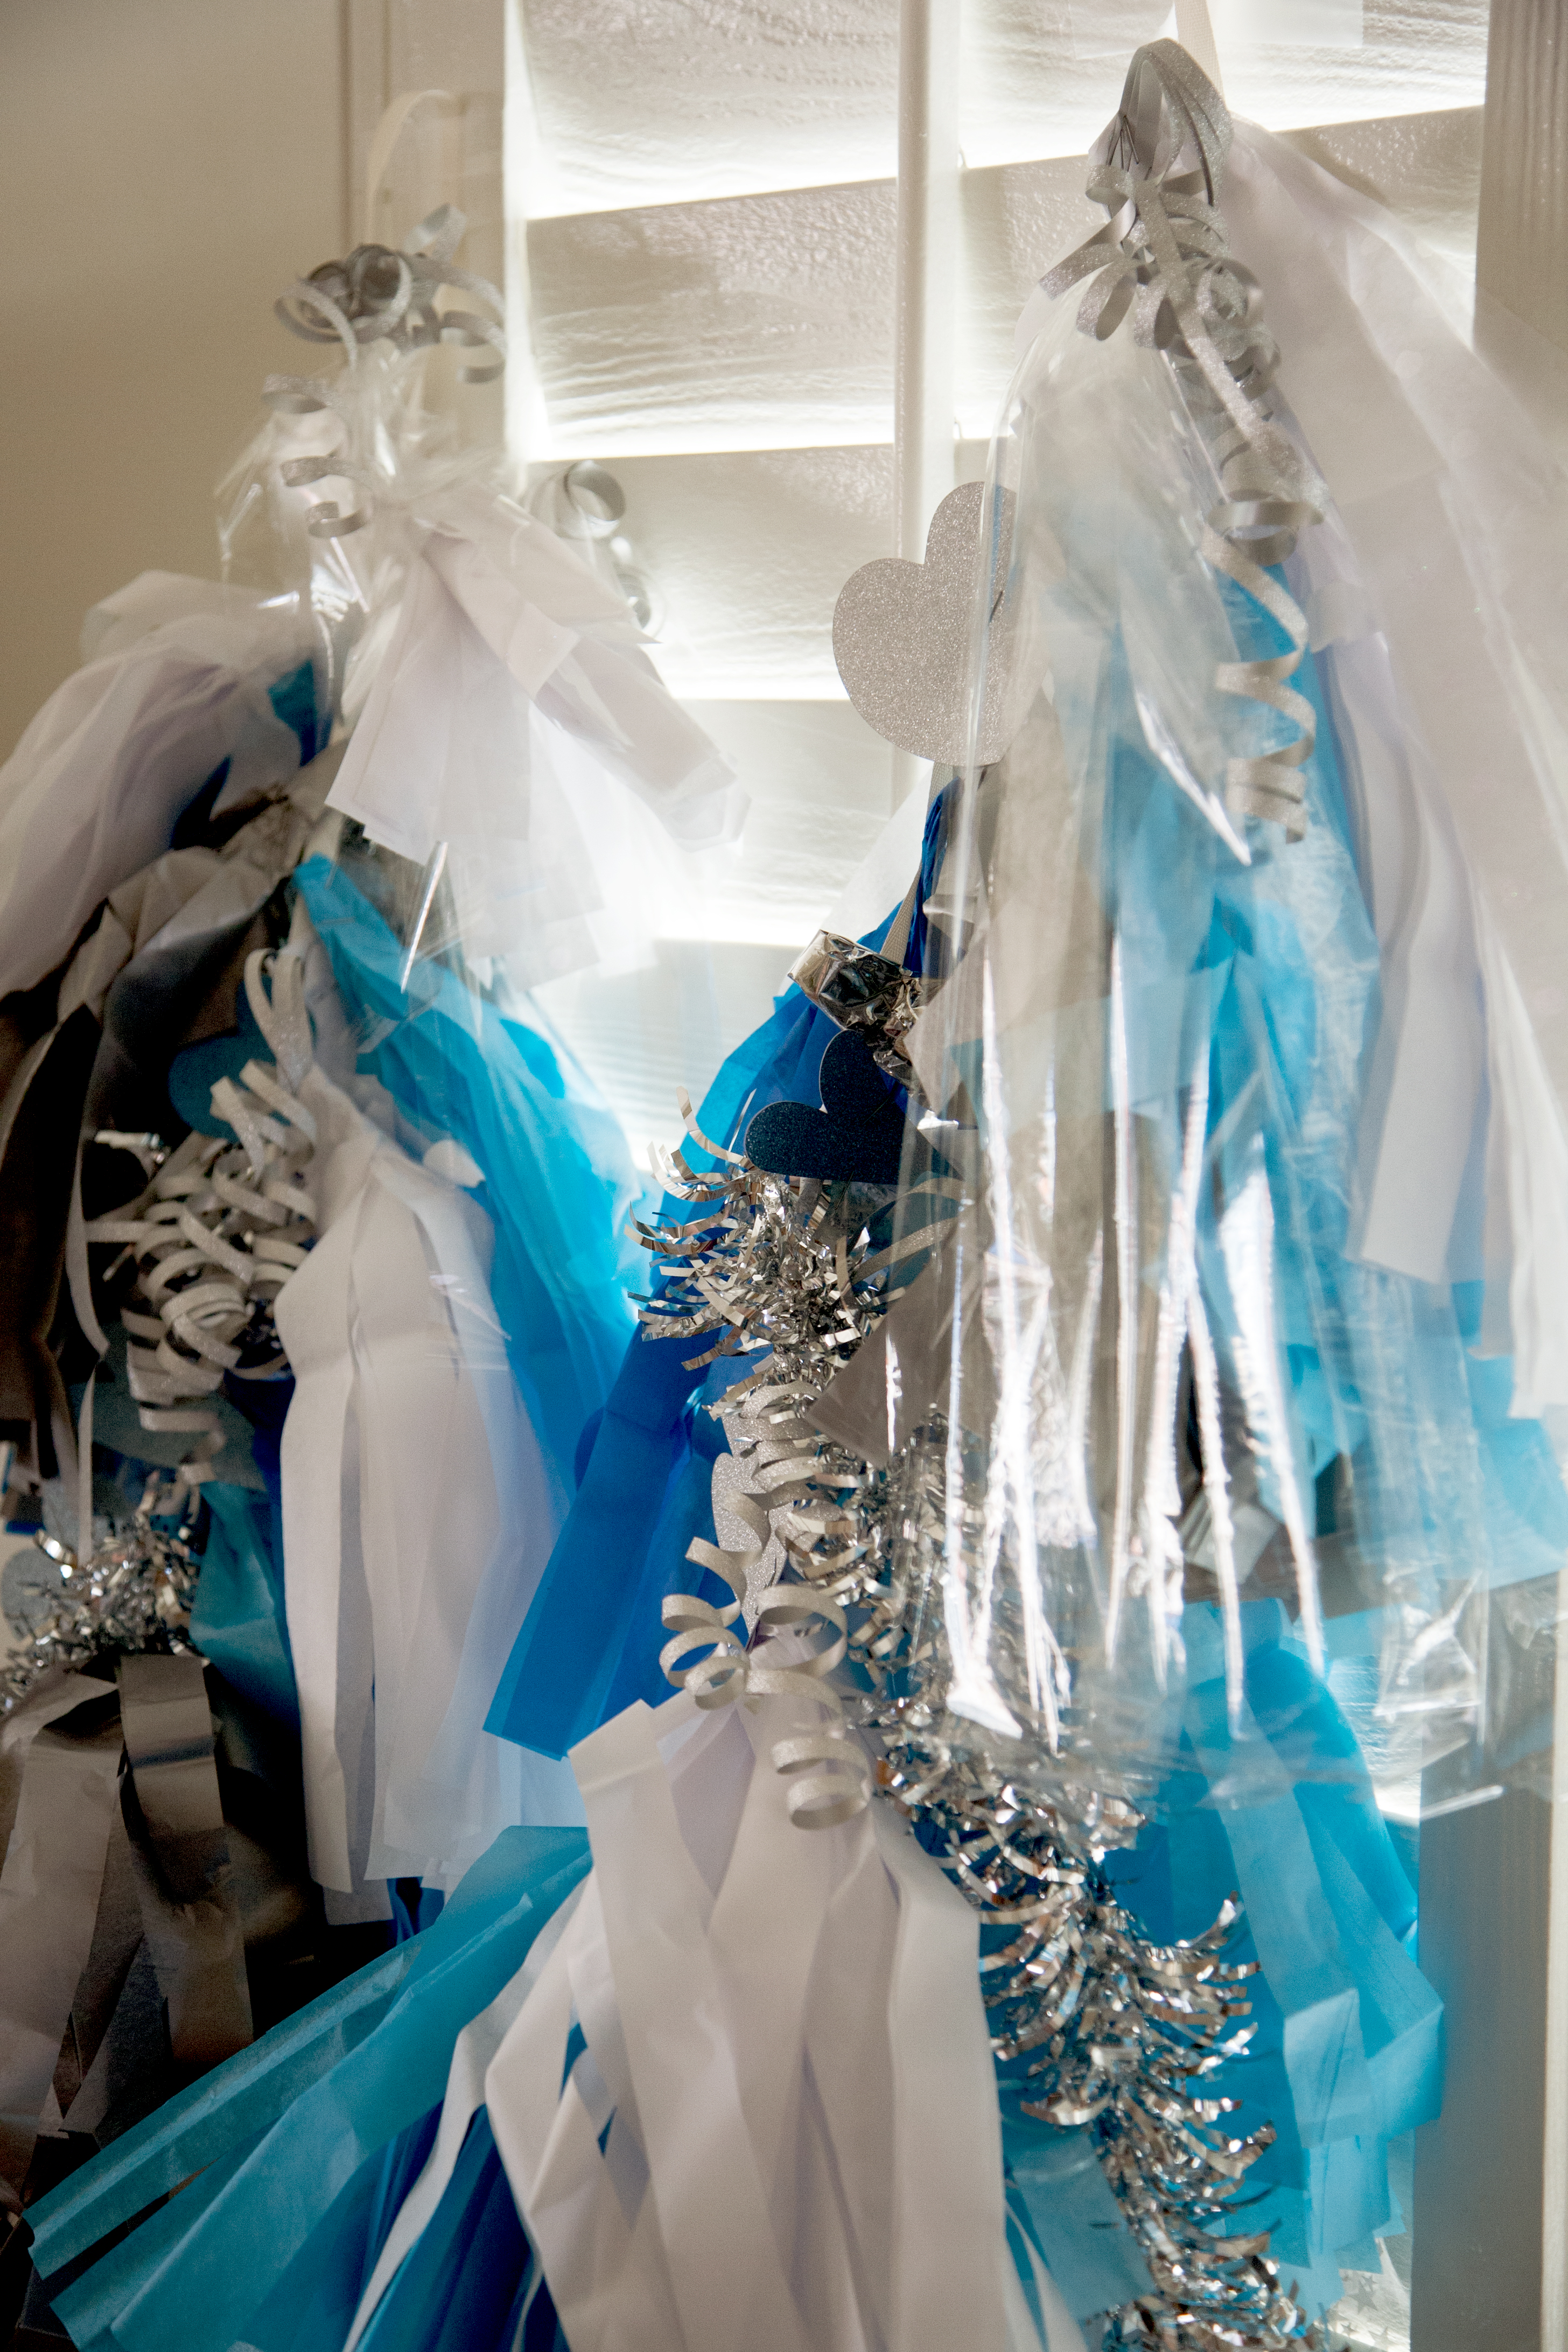
Next up, The Geronimo balloons.  Sigh.  This was my nieces idea.  I loved it, but seriously had no clue just how much of a time suck they are.  Looking at the pictures online of all these gorgeous creations, I can see that we may have just gone a little over board on the fringe but I still love how they came out.  It took us 2 days to make all the fringe and attach it.  It was made out of tissue paper, mylar, christmas garland, curly ribbons and hearts cut out of POW glitter paper.  I called the ONLY balloon lady on the island and asked her if she could blow up the big 36″ balloons and she assured me she could.  When we showed up to her shop and we pulled out the balloons she said that she could not fill them because they didn’t want to waste helium because it was hard to get and blah, blah, blah.  But we are PAYING you for the helium lady!  So we ended up buying 14 regular balloons from her for $40.  $40 people!!!!!!  And they wouldn’t hold up the fringe.  We were a little deflated after that.  HAHAHA.

IMG_7416 copy

But look how pretty the fringe is.  Imagine a giant balloon holding all that up and blowing in the wind.  I carried all that fringe back to the mainland in a trash bag because no way in hell was I throwing it away and well, you can carry anything on that boat.  Geronimo fringe included!   No wonder they charge $200-$300 for the real Geronimo Balloons, they are labor intensive.

IMG_7476 copy

My niece made this awesome Happy 40th Anniversary Banner on her Silhouette then she attached tissue paper fringe in back and it was just so cute and pretty.

IMG_7467 copy

We saw something like this on Pinterest and knew we had to replicate it.  Such a cool idea!  We used one of those laser cut wood frames from Michaels and painted the middle in the Martha Stewart Chalkboard Paint and my niece and her boyfriend figured out all the wording right down to all the kart races they attended and wrote it all out.

IMG_7407 copy

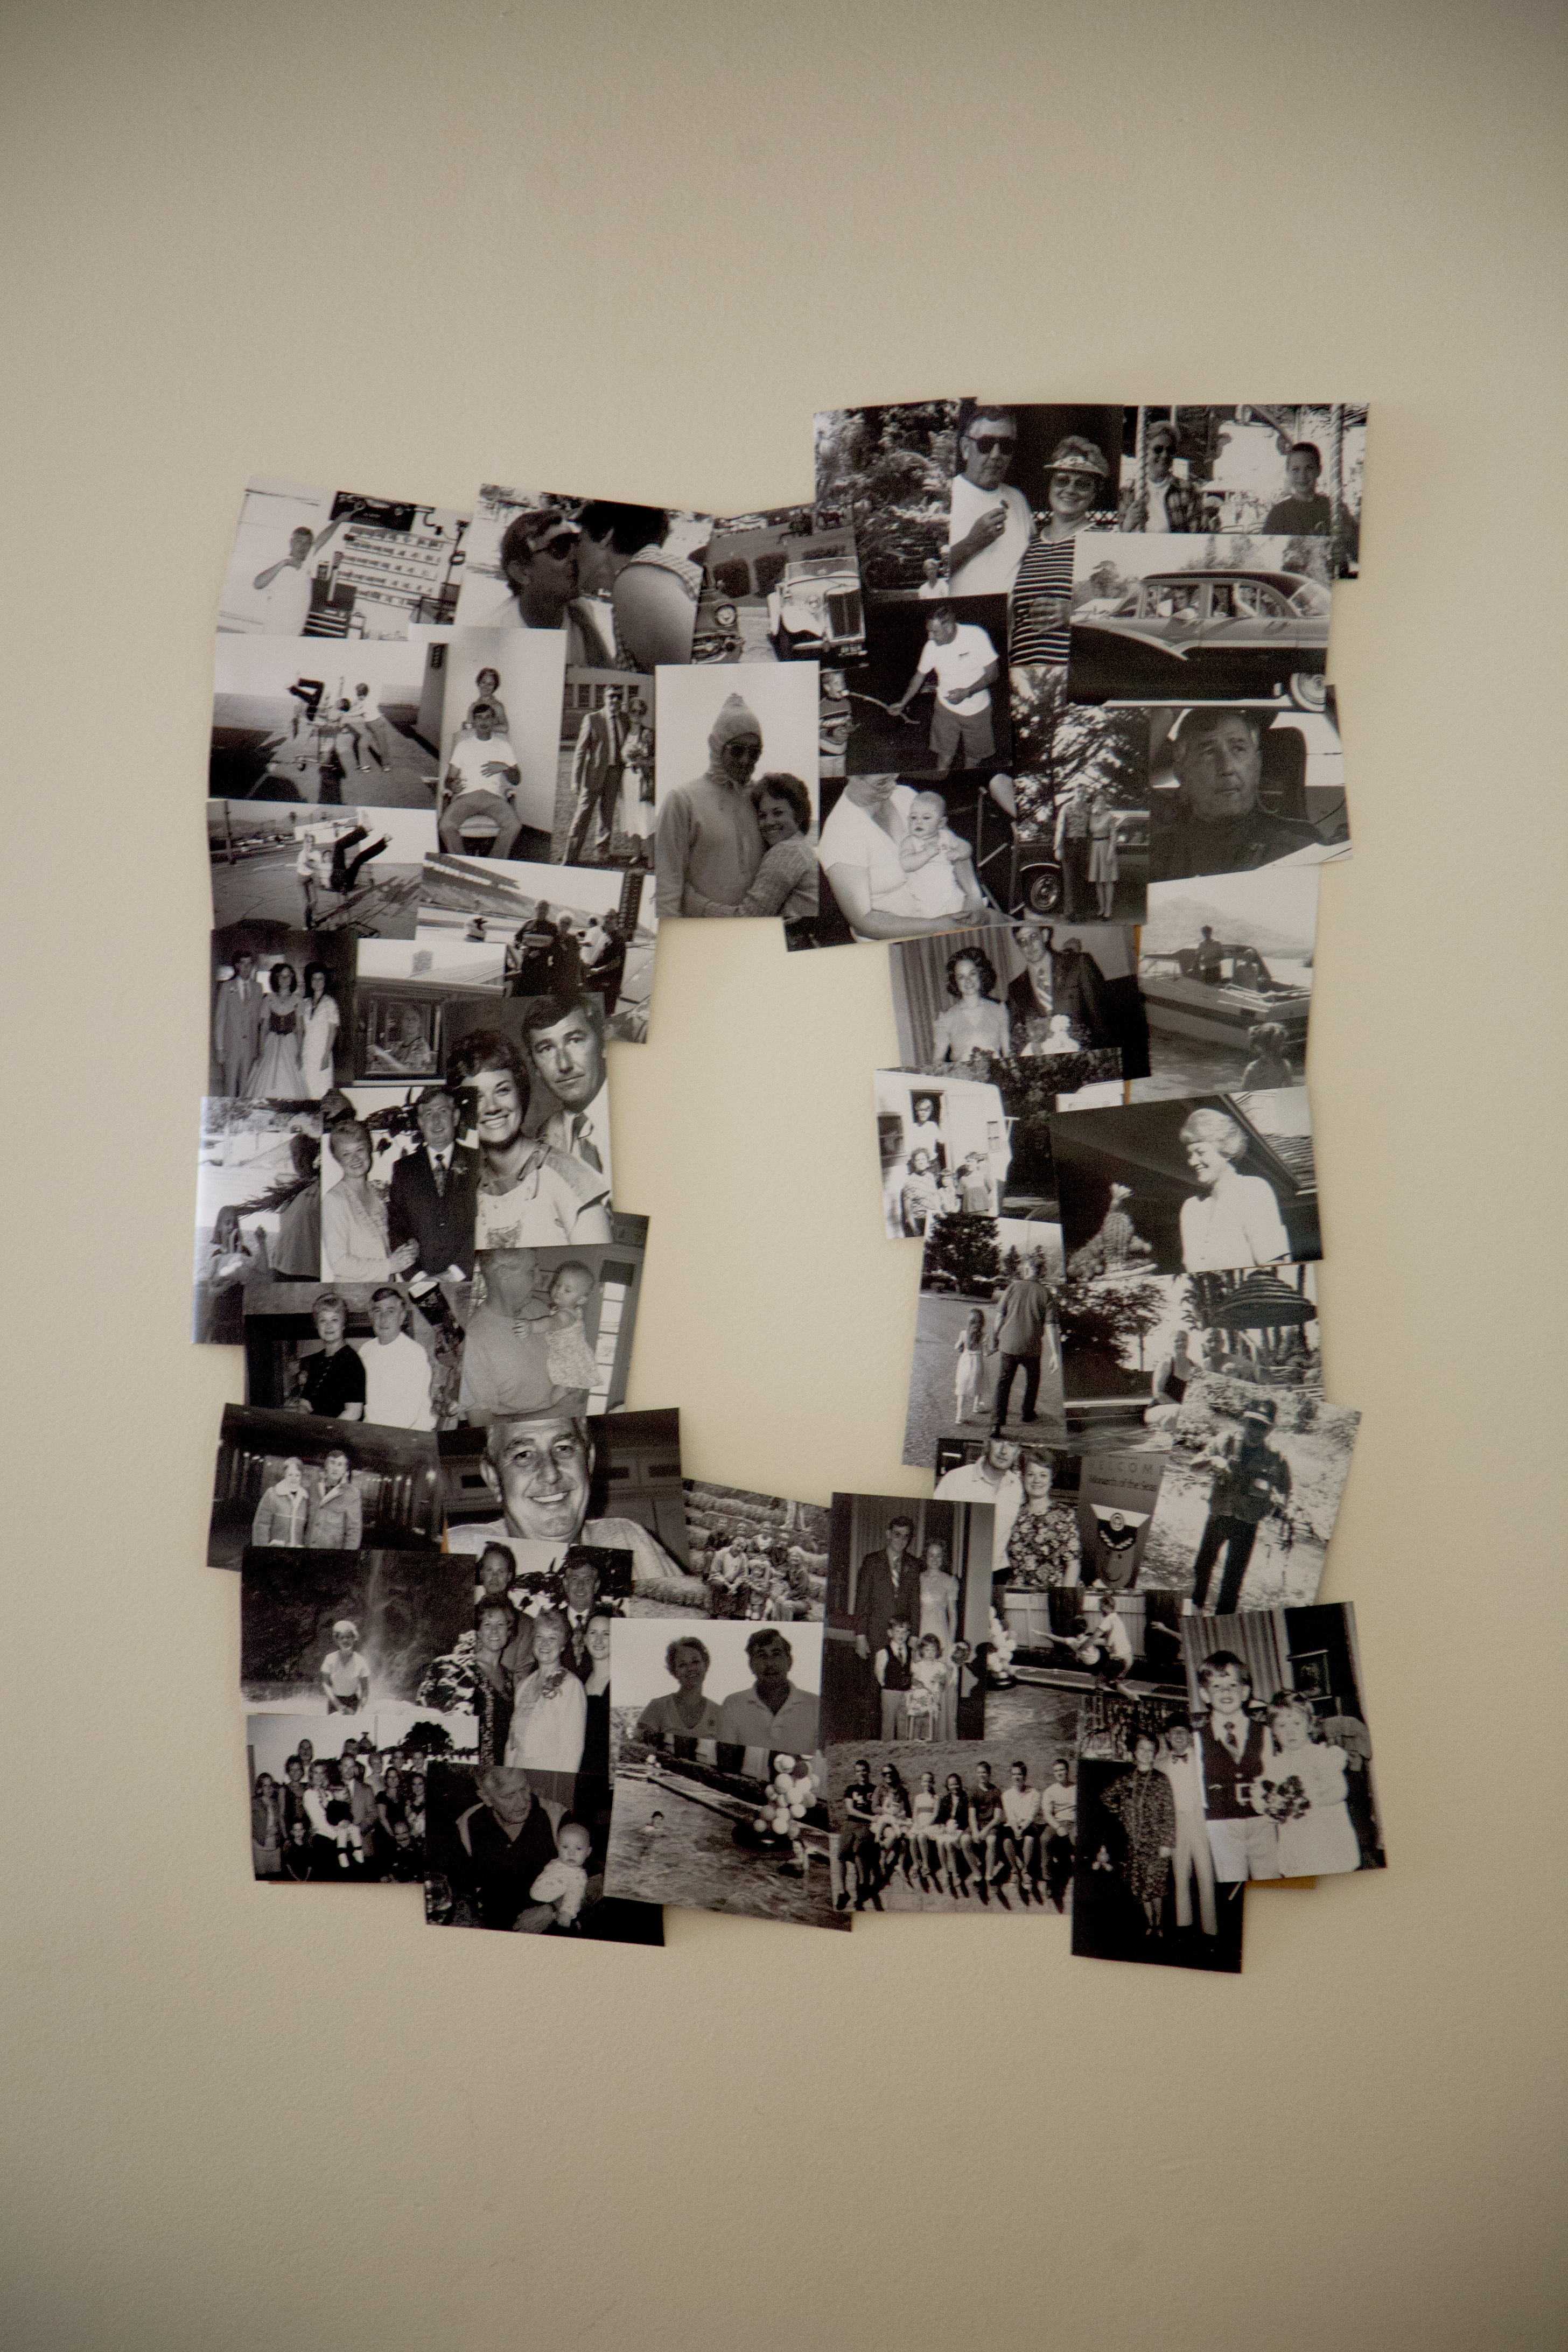
Also, another Pinterest idea.  We printed out 100 black and white photos from the last 40 years and my daughter Bella spent a few hours making them into a giant 4 and 0.  Another project that had to be assembled when we got there.  These ended up being about 4′ tall by 3′ wide.

IMG_7420 copy IMG_7419 copy

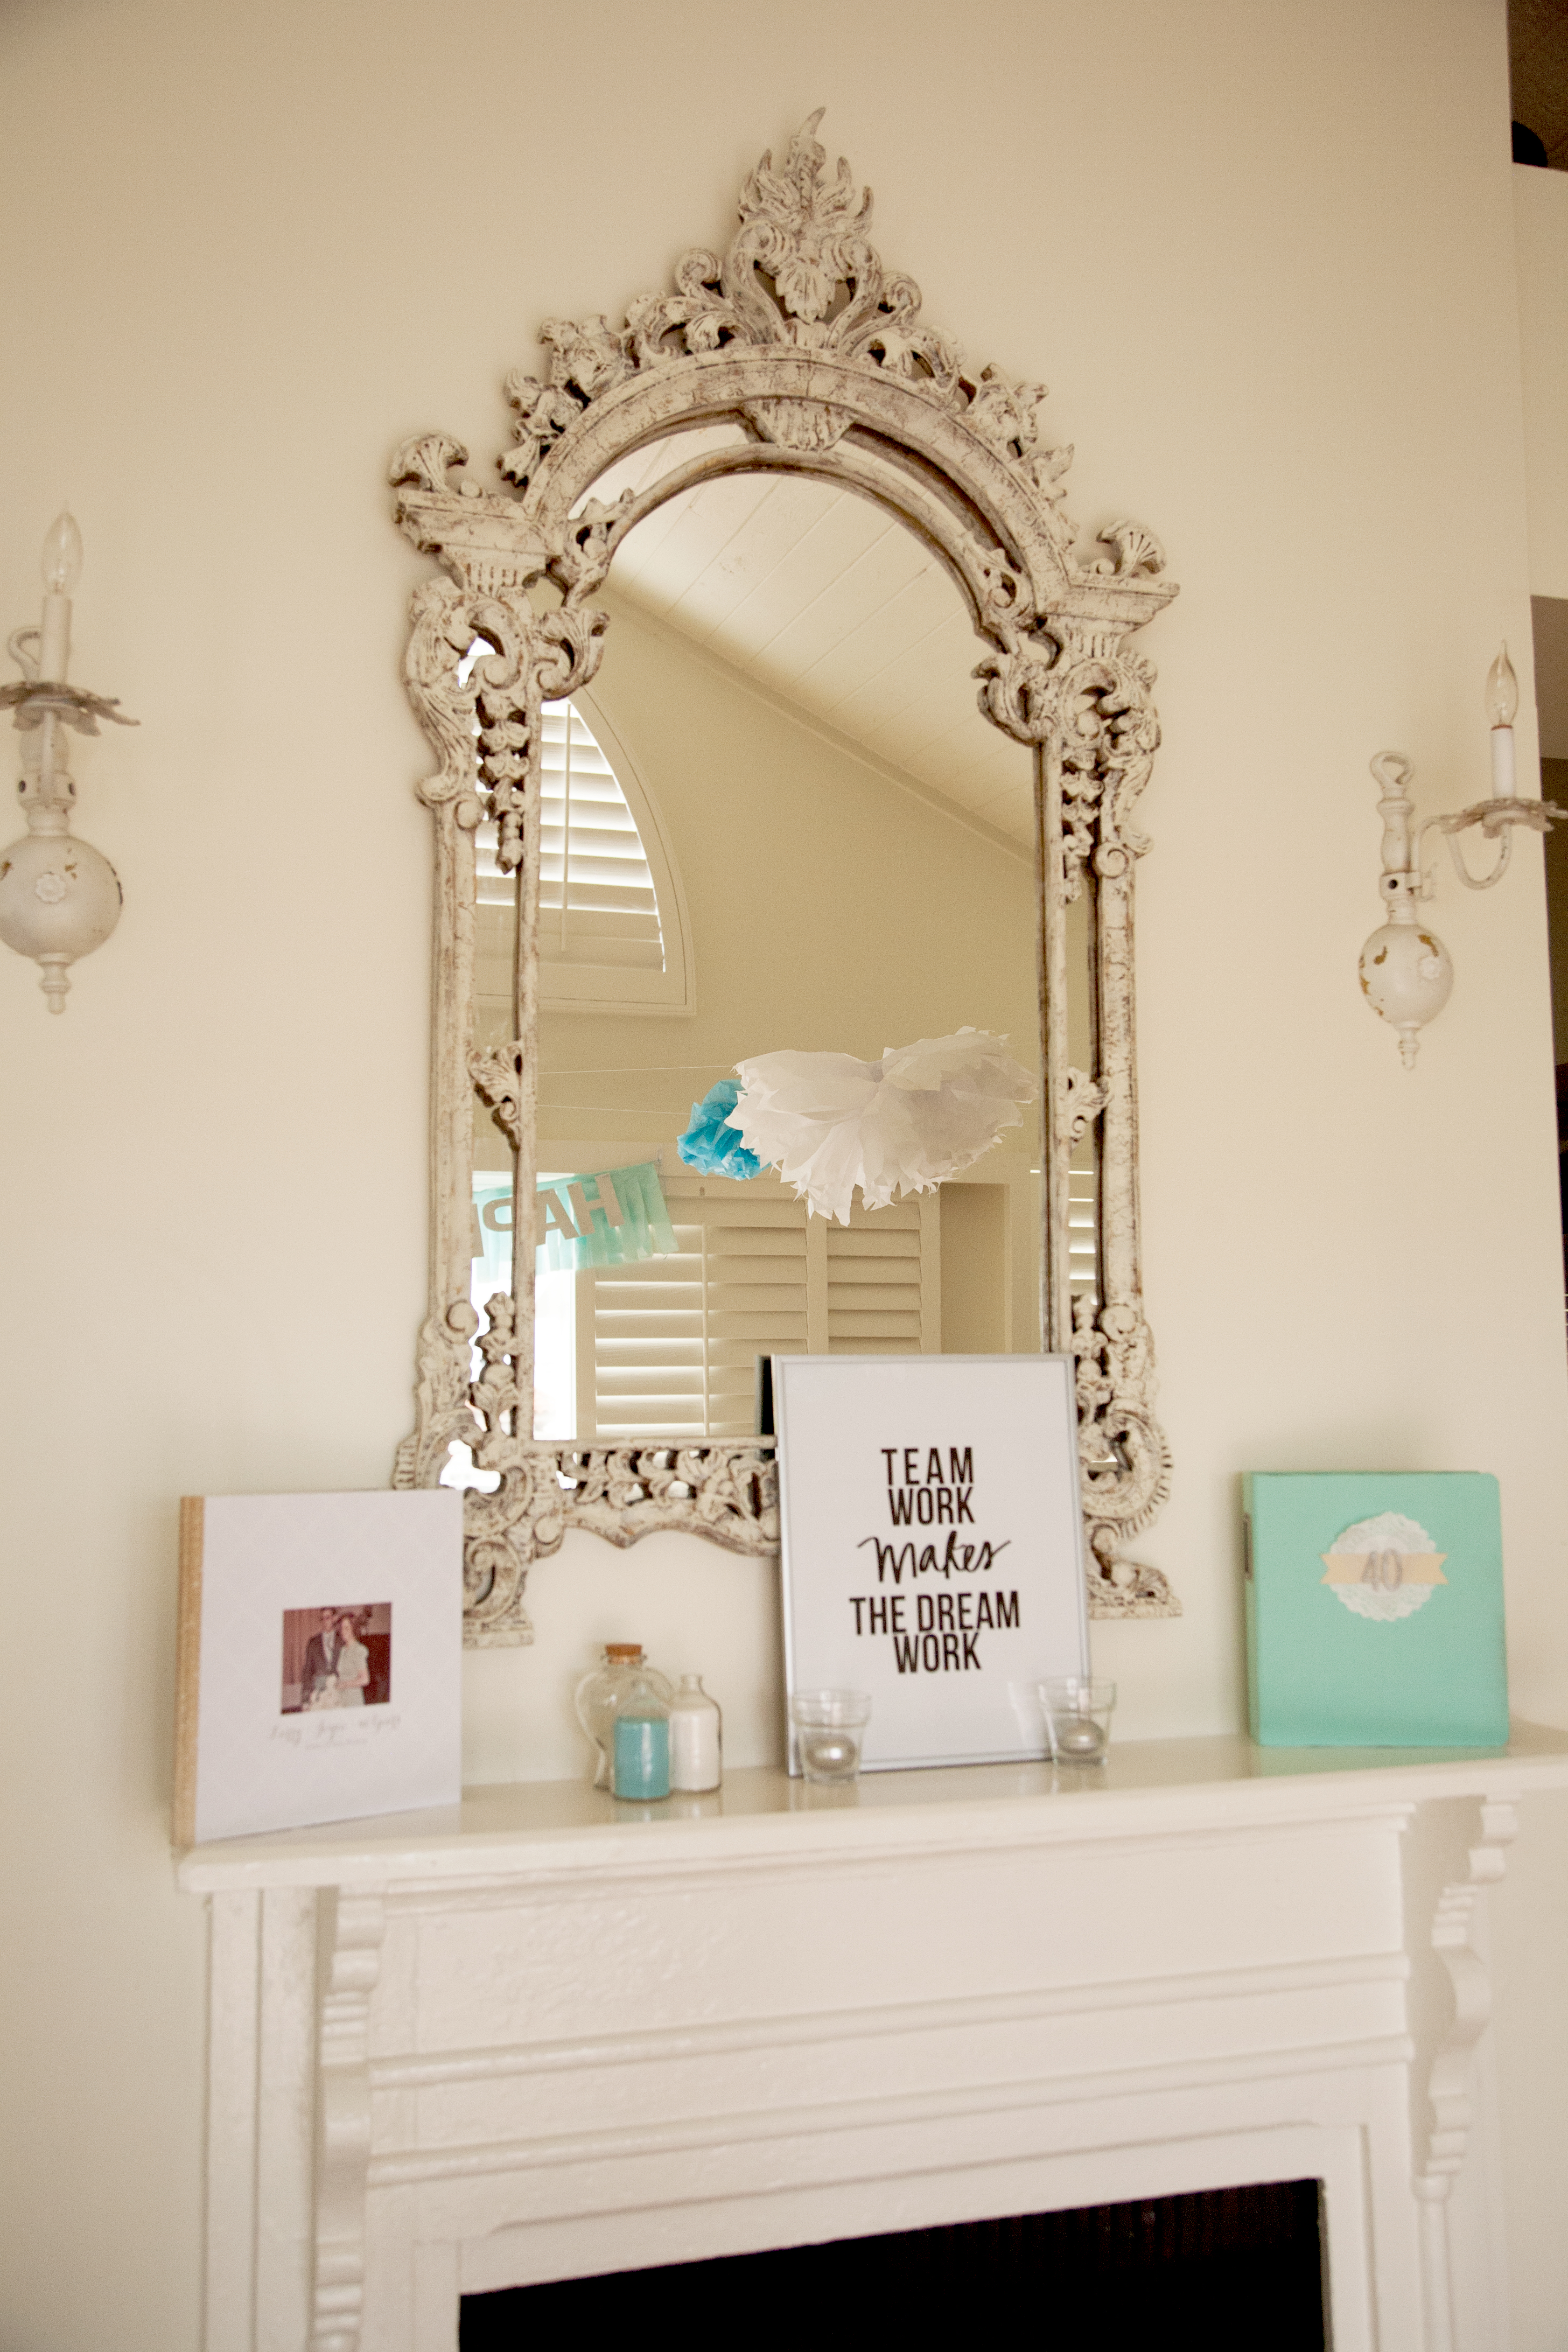
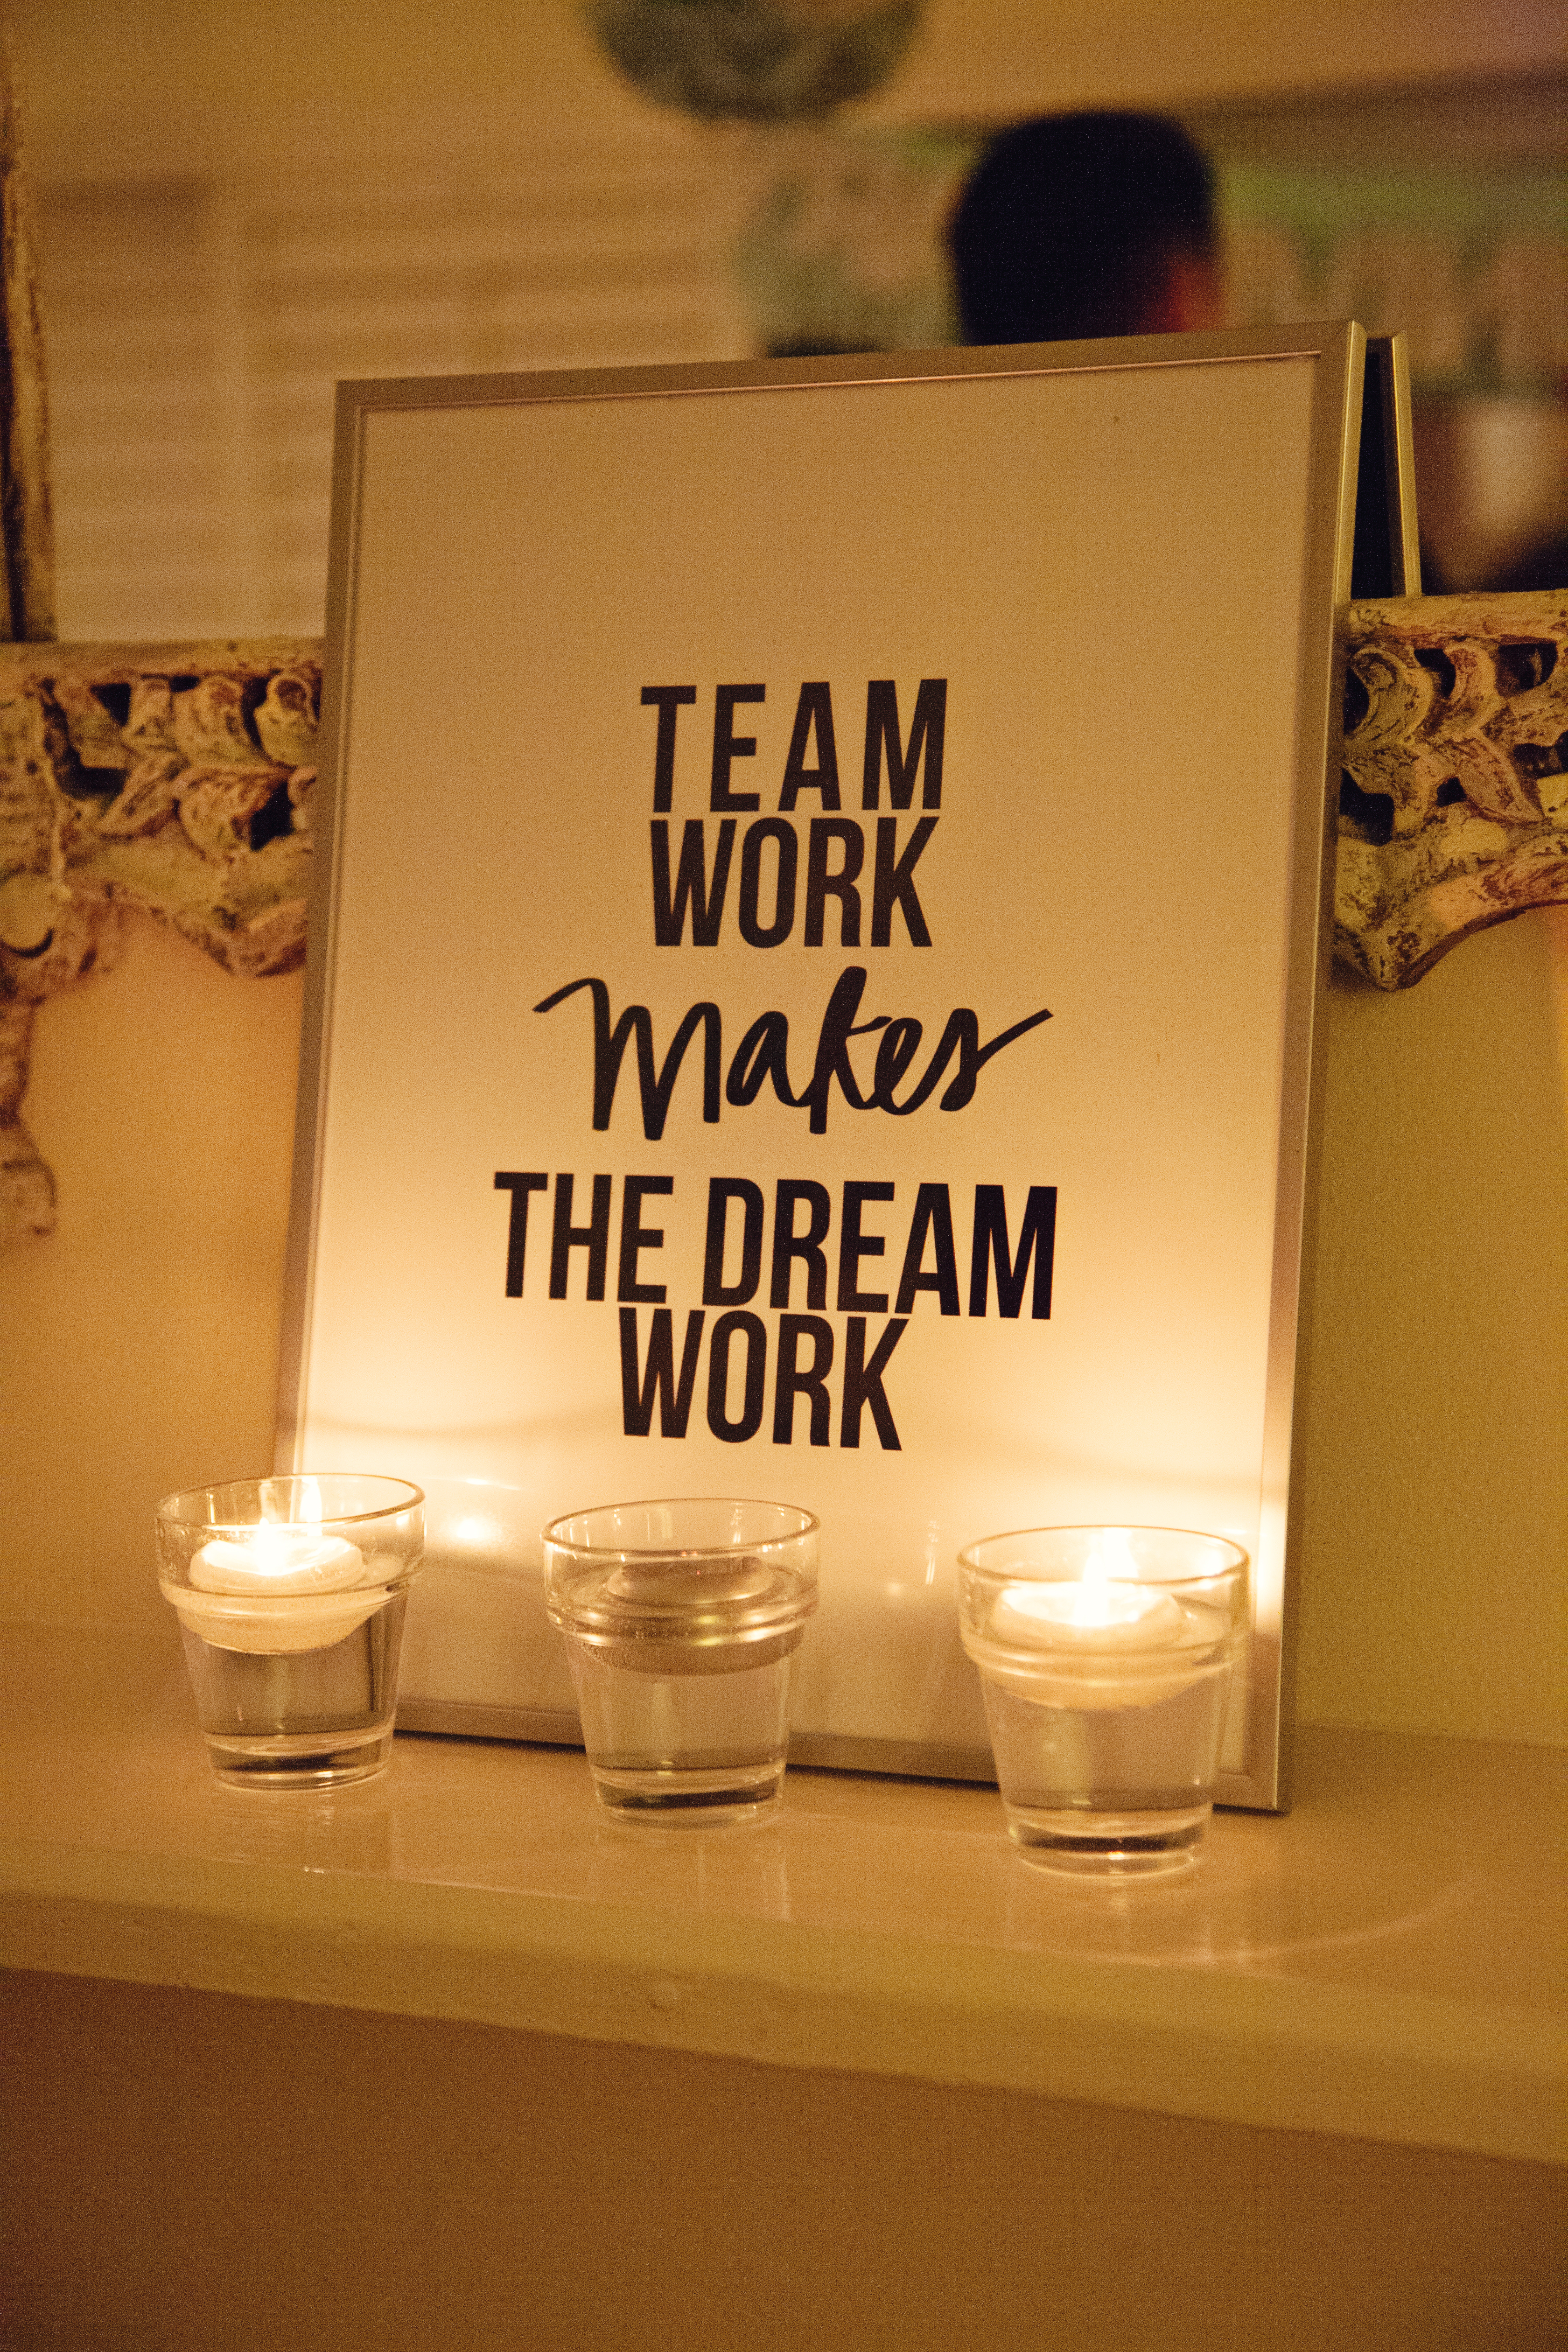
This mantle in the beach house was the perfect place to display some of the stuff that was made.  We had a Shutterfly book made for my parents of photos from the last 40 years.  My niece took the other quote my dad wanted incorporated – Team Work Makes the Dream Work and made this awesome sign.  She also sent out blank cards to all my parents family and friends and had them write a little something and send them back and she put together this adorable little album for my parents.

IMG_7469 copy  IMG_7573

We kept coming up with more and more ideas and projects for this party.  About 3 weeks before we had the idea to make a playlist of all the songs from 1974 that my parents loved.  We played it at the ceremony just in the background.  We also made CD’s with some of the songs for everyone to take home.  We used THESE CD’s that look like little records.  So cute!  The sleeves were made out of kraft paper that I printed on, folded and just sewed up on each side. I also put together a compilation of famous things that happened in 1974 and made little note cards out of them for the tables.

IMG_7527 copy 1974_edited-2

Of course you have to have custom stickers on your water bottles.

IMG_7410 copy

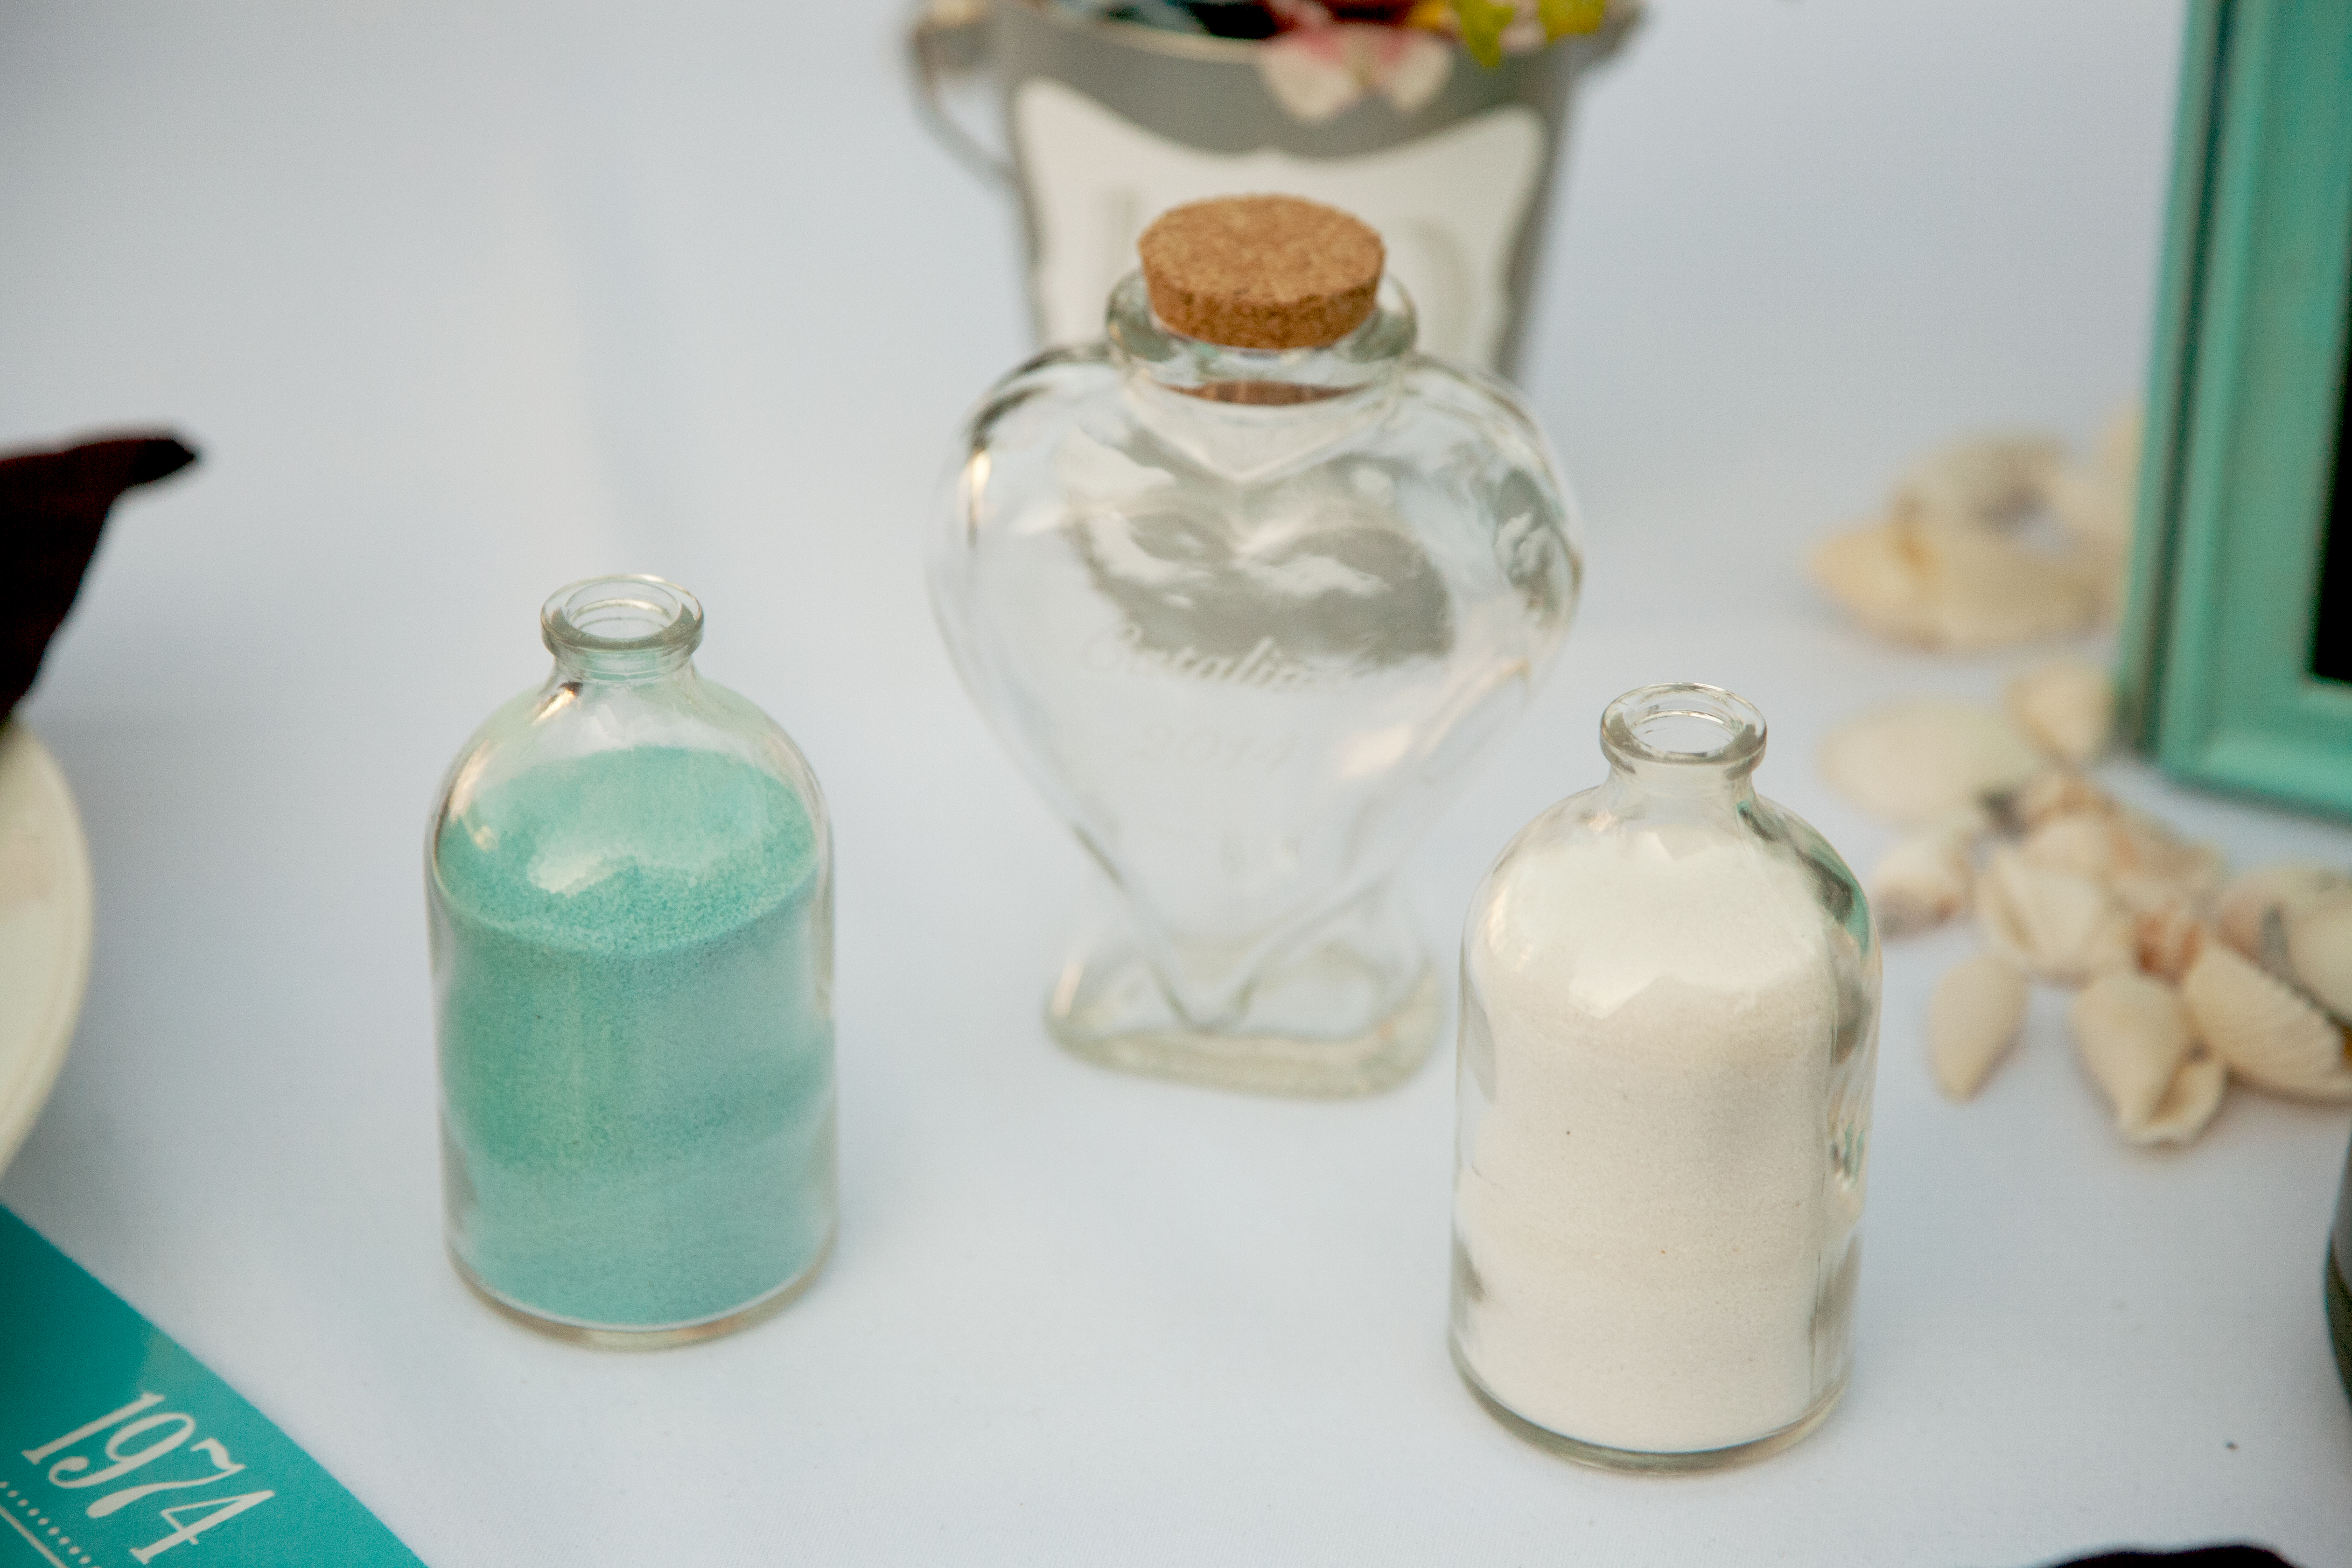
We did a sand ceremony for my parents.  Symbolizing togetherness and that once you mix sand you cannot separate it.  So every person who attended poured a little bit of sand into the main bottle and my parents can keep that as a memento as well.

IMG_7511 copy

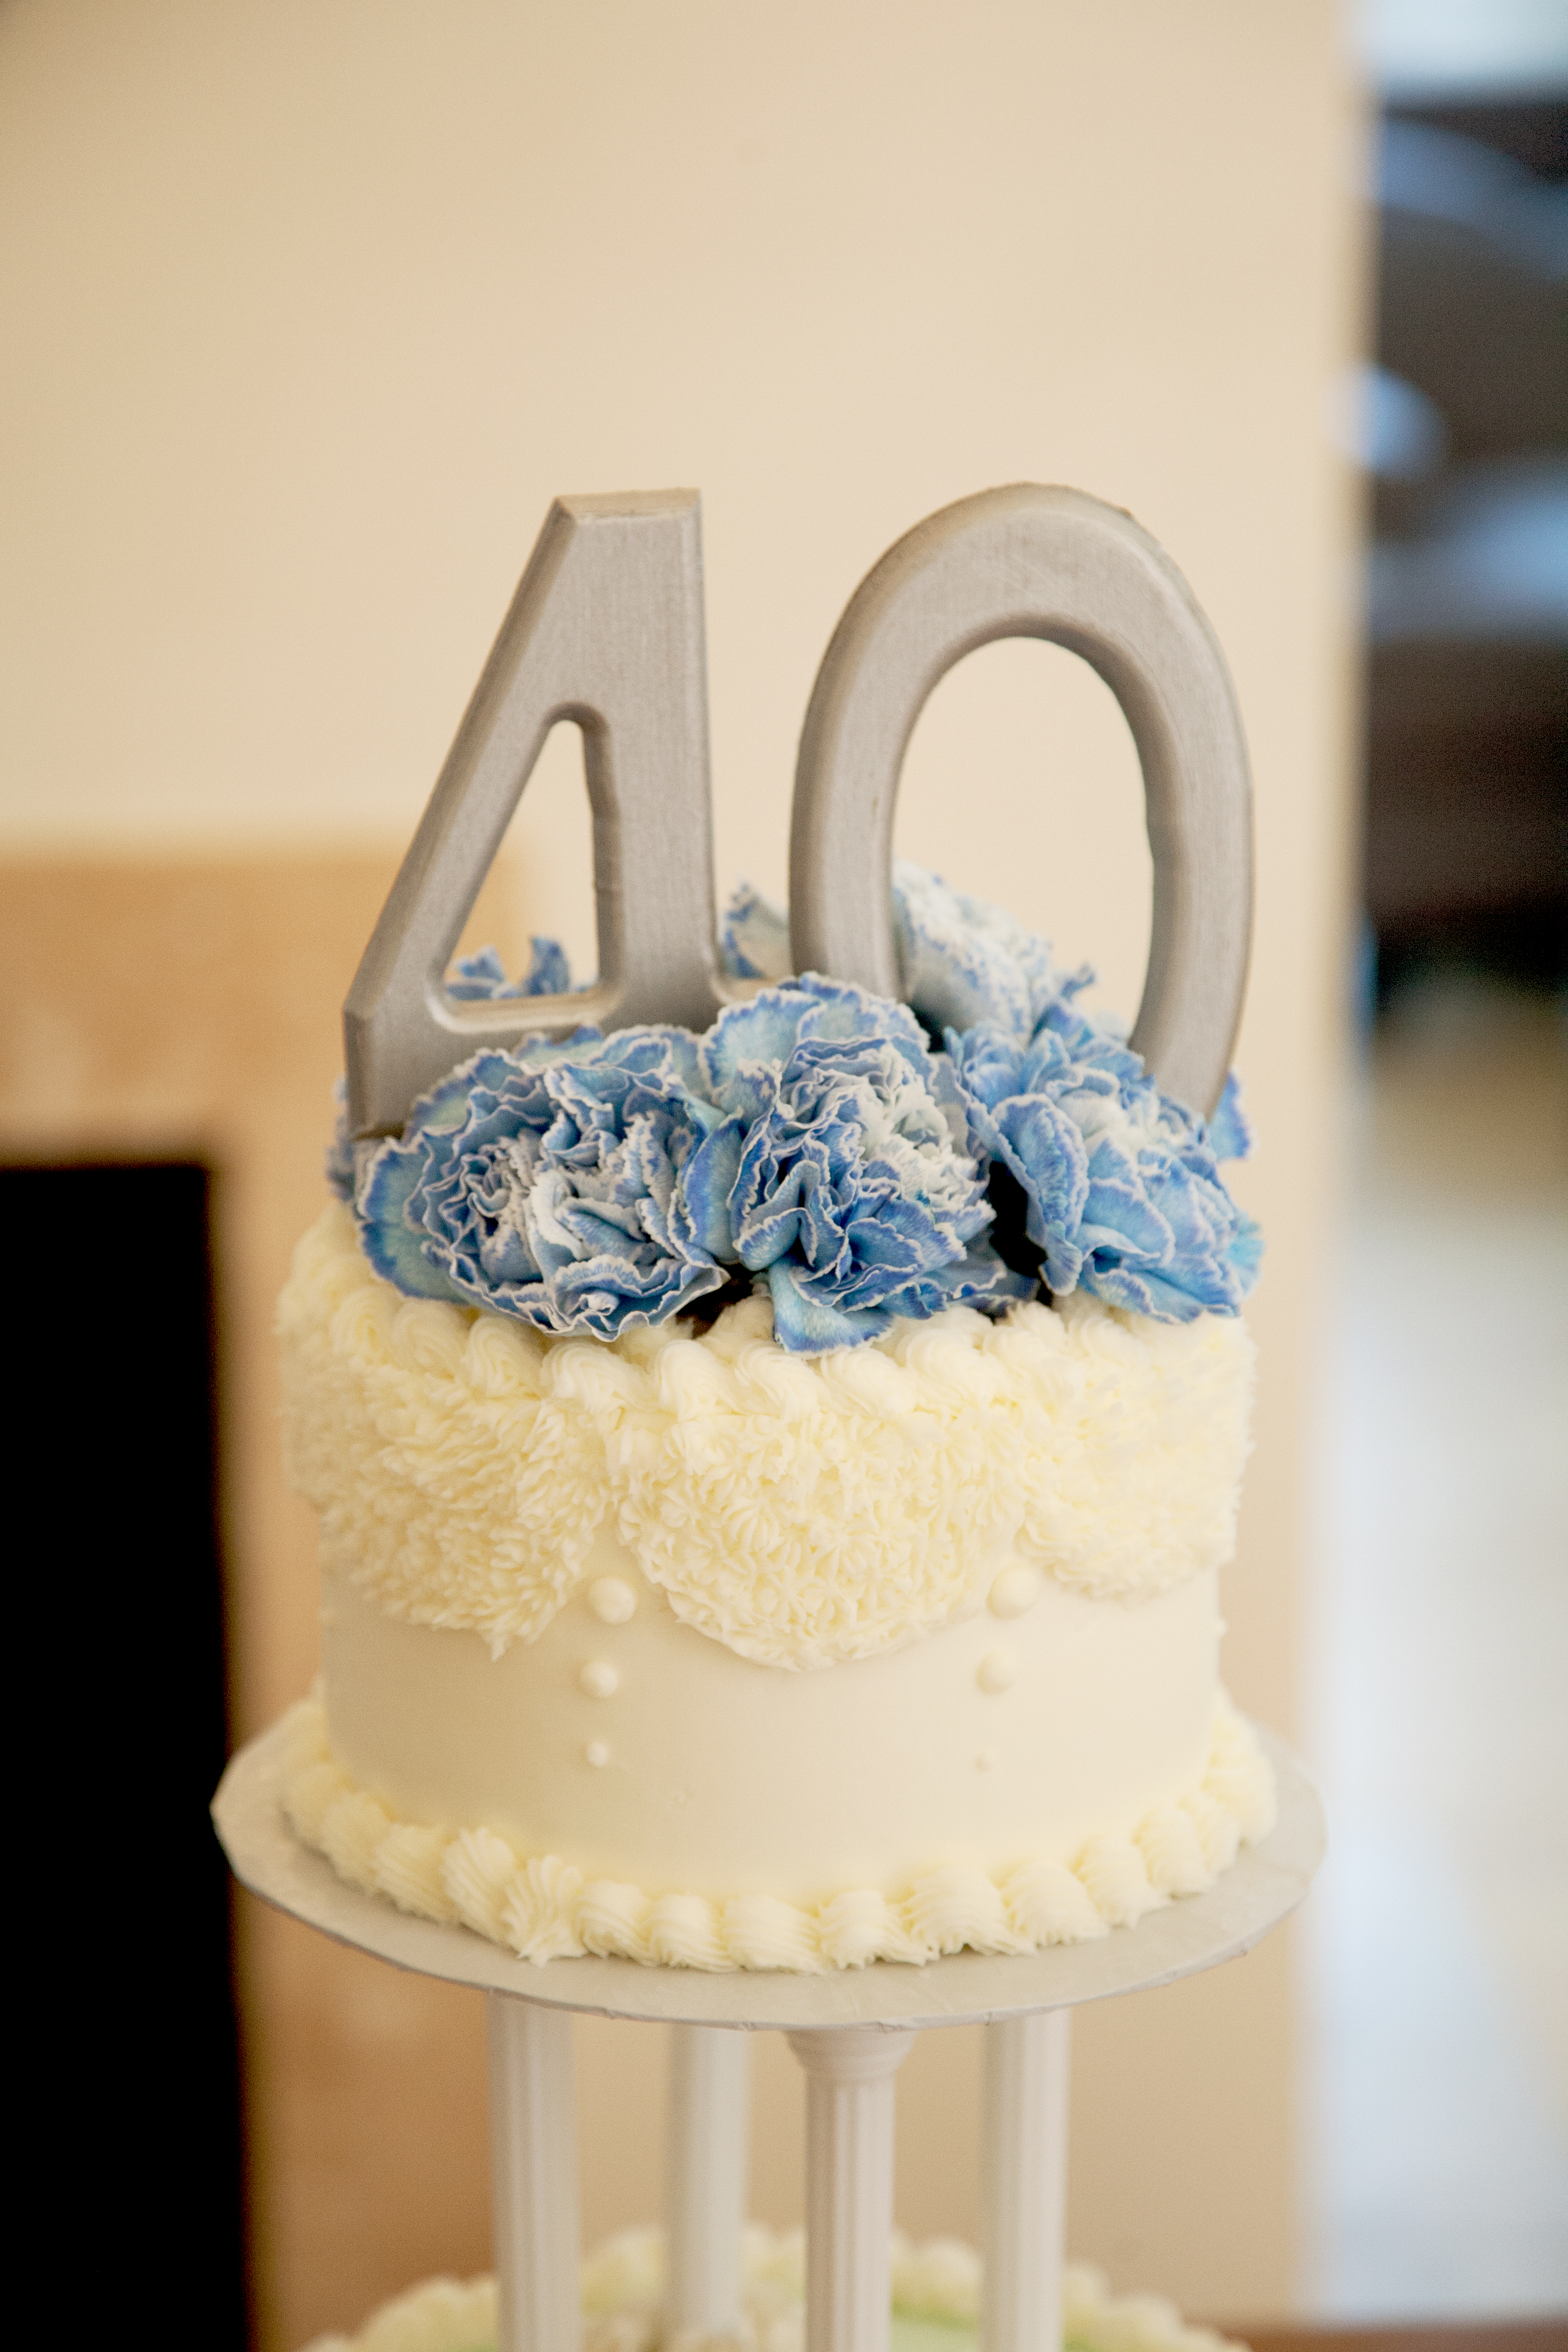
The cake.  Oh the cake.  We originally were going to try to replicate their cake topper they had at their wedding 40 years ago but nobody, absolutely nobody sells wedding bells or Lily of the Valley or anything that even resembled it.  We decided we would just put a big 4-0 on it with some of the carnations and call it a day.  Well, the original cake lady left the island and handed it over to another cake lady who wasn’t quite sure what we wanted.  We had to have my Aunt Sally call the lady and describe the cake because she had made the original one 40 years ago.  Aside from the fact that the carnations were a totally different color than the cake, the cake was delicious.

IMG_7473 copy

That’s it for the decorations.  Next post is all about the ceremony and photos of people 🙂


40th Anniversary Party|Part One of Three

Ok, here it goes.  Dusting off this blog I’ve had for 7 years now. I’m going to start blogging again…in my spare time of course.  Ha! I still need to tweak some things on here.

Starting with my parents 40th Anniversary party.  It’s way too long to fit in one post so I’m breaking it up into three.  Part One – The Destination, Catalina Island.

Just after my parents 39th anniversary in 2013, my dad had this idea that he really wanted to do something special for their 40th anniversary.  He said he wanted to renew vows, he wanted it super private and he wanted his kids and grand kids to attend.  He mentioned that my mom really loves Catalina Island and asked if me and my niece and I could figure something out.  SURE!

So we started our search for places to hold this shindig.  We looked (online) at EVERY single hotel and house on the island.  Seriously, it was a daunting task because some places would be perfect for sleeping but didn’t have anywhere for a private party or they were perched on top of a hill with 3, 420 steps up to it.  After months and months of searching we finally found the perfect place.  The Hotel Metropole.  I had some difficulty actually making the reservations and getting people to call me back but once we arrived at the hotel the staff were very attentive.

IMG_7425 copy

We rented “The Beach House”, which is an 1800 square foot house with a huge deck that overlooks Crescent & Metropole Avenues and accommodates up to 50 people.  The Beach House is part of the hotel so we were able to get everyone else rooms nearby.  This is the deck.  Perfect for lounging any time of day.  We played games around the table at night with the heaters on.  Fun times!

IMG_7375 copy

View from deck.  There’s Olaf’s Ice Cream across the street.  We spent a lot of money in that place over the course of 4 days.  There was also this place called Coney Island West which was right below us.  It’s the closest thing to fast food on Catalina and was delicious.

IMG_7389 copy

The hotel also has a restaurant called the M Restaurant by Zest Catering and Events.  We had our party catered  by them and that was also another decision that was well made.  The food was amazingly delicious! The hotel took all the patio furniture off the deck and replaced it with big round tables for the catered dinner and we had servers so we didn’t have to do a thing.

IMG_7479 copy

Side Note:  There was a lot of construction going on right next to the hotel, which was kind of a bummer.  An enormous hole in the ground with all kinds of construction fences around it.  On the morning of my parents ceremony we noticed a group of people gathering inside the construction fences.  They were performing some kind of ritual.  Lots of chanting and banging of things.  This went on for hours and since our deck was right there, we were all watching from above.  I don’t think they liked us very much but it was intriguing.   Apparently, when they were digging up the street and some bones were found so they had to call in “the Professionals” (no idea what to call them)  to bless them and re-bury them.  It was our entertainment for the morning.

I would like to point out that everything we planned on making for decorations had to fit into our suitcases and/or be assembled when we got there.  We did this because Catalina Expresses Do’s and Dont’s about baggage had a laundry list of things you could not bring.  Human corpses was one of them 🙂  Little did we know that they don’t even check your luggage and we could have carried cases of beer and trash bags full of crap on board without being questioned, so arts and crafts were really no biggie.  I really wish I could have found something online about this before we went over. So here it is for anyone else planning a wedding or large gathering on Catalina Island – you really can bring food, alcohol, flowers, glass and pretty much anything you can carry on board…except for dead bodies.

I would also like to give huge praises to the only florist on the island Bloom Floral.  My parents had dyed blue carnations at their wedding so we really wanted to incorporate those into the ceremony.  She got them for us so we didn’t have to lug a huge bunch over on the boat, although we totally could have.

That’s it for now.  In a few days I will post about the decorations.

Chere


Happy Halloween! Oh wait, it’s almost Christmas. BLEH!

So bad about blogging now and I’ve just moved my blog over here to WordPress (a work in progress).  I couldn’t change my URL/last name without losing those followers I MIGHT still have after all these years, so I’m just re-directing.   I thought I should post the pics of the Spooky Spell Book we made before Christmas actually got here.  I should probably throw in some pumpkin patch pics as well.  At this rate, I will be posting Christmas pics on Easter.

First off, here’s some pumpkin patch pics:

Now here’s the pics from start to finish of the Spooky Spell Book we made for Halloween.  It started out just as a decoration for the table, but then I thought it would make a great scrapbook of all the Halloween’s for the girls.  So every year I will put their pics in there.  I started with an unabridged dictionary from 1988.  Luckily, my mom had one just lying around 🙂  Who uses actual dictionaries these days? I wanted to put secret compartments in it so I took my X-acto knife and tediously cut through hundreds of sheets of paper.  (I don’t have any pictures of this process, sorry.) My thumb and index finger were numb for about a week after doing this.  Not fun.

To prepare the outside of the book I used Gesso and painted over everything, except the pages.

I knew I wanted some type of design on the front of it and remembered seeing this on Pinterest.  So I searched the internet for  some kind of design to put on the front.  I found some over at DeviantArt.  I first tried using some cheap White Glue we had  and it was way too thin and it wasn’t giving the raised look that I was going for.  So Bella had some Crayola No-Run School Glue and it was thick and the bottle was small so it was easy to deal with, worked perfectly!  I also added some decoration to the spine.  I let the design dry overnight.  I then painted another coat of Gesso on top so that the paint would stick to the glue.

I took 4 different colors of matte acrylic paint – dark brown, light cinnamon, mustard and grey .  There was no rhyme or reason to painting, I just put it on there until it looked good and OLD and making sure all the white was covered.

I let that dry for a few hours and then added a coat of Instant Age Varnish. The knob on the outside was found in the jewelry aisle at Michaels.  Not even sure what they originally started out as, I just knew I wanted something that looked like a knob on the front.   I hot glued them on, added a chain with some jewels on it for a bookmark.

I found some really cool OLD Tarot Card Photoshop brushes on DeviantArt, so I printed them out, cut them into cards, tea dyed and dried them and tucked them inside their own little pocket in the top of the book.  There is another little secret compartment on the bottom of the book where I plan to put a little mini album of some sort.  Next year, next year!

As far as the inside of the book goes, I ripped out A WHOLE LOT of pages and the thing just seemed like it kept getting bigger and bigger with the more glue I put on.  I was gluing about 3-4 pages together to make them thicker, not the whole book just some.  I scoured the internet for spooky spells, most of what I found came from Wizards of Waverly Place, Harry Potter or Charmed but I did find some other cool stuff on DeviantArt – Broom Licenses, aka Astral Travel.  I printed them out and glued them all into the book.  Since the book was getting fatter and fatter, I figured that I wouldn’t be able to add many bulky embellishments to the photos I put in there, so I mostly used paint.  I also painted all the edges of the paper with antique gold paint.

So, there you go.  It was fun to make but a lot of work!

HSM Party ROCKED!

Well the bounce house ROCKED at least.  That’s what one of Bella’s little girl friends told me as she came flying down the slide!

Bella had stayed the night at my parents house the night before and my niece helped her decorate with these wall decals we got at the Disney Store and the pennant banner that I made.  It’s a good thing my nieces school has the same colors and mascot as HSM does, it made for instant decor!  She let us borrow her real megaphones and her friend loaned us her pom poms. 

Here’s a picture of the table decorations.

Table1

Table2

Jacki loaned us their karaoke machine and I got the HSM Karaoke CD’s.  Turns out they didn’t even need to read the words on the screen, most of the kids knew all the songs by heart! 

Here’s Bella belting her rendition of Fabulous!

Bellasinging

Bella2

Bella3

Bella4

The party was great and I think all the kids enjoyed the bounce house immensely!!!  I’m glad it’s over though, party planning is exhausting!

Halloween!

Bella started out wanting to be the Cheshire Cat from Alice in Wonderland.  We went to see an Alice in Wonderland play this summer and the cat was blue.  She refused to wear any face paint so really she’s not the Cheshire Cat but just a pretty blue cat, with bright blue eyeshadow! LOL  So I spent a couple of days making this costume for her. I had a hard time with the hood and getting the ears straight and I wished it was longer but oh well, It turned out cute and she was happy with it.  I tied the tail to her arm with fishing line so when she moved her arm her tail would move…that lasted all of about 30 minutes until she broke the fishing line and we had to repair it! We had a great time trick-or-treating in Jacki’s neighborhood (ours doesn’t get TOTer’s).  Bella was literally running from house to house, which she has never done in years past. 

Bella_halloween_2

Bella_halloween_3

Bella_halloween

Bella_halloween_4

Brooming the leaves

Bella_leaves_20072

Every year since Bella was able to walk we have raked up the fallen leaves in the yard and let her play in them so of course she looks forward to that now that she’s getting older and can remember years past.  This year is no different, although somewhere along the line we’ve lost or misplaced
our rake and is now replaced by brooms.  So we "broomed" the leaves into a pile which took WAY longer to do BTW.
  Bella_leaves_200714

The leaf brooming quickly turned into scooping up leaves with the brooms and throwing them at each other.  Mostly it was Bella and Carey with me behind the camera of course.
Bella_leaves_200746

Bella_leaves_200750

Then she saw me and headed straight for me….

Bella_leaves_200773

Bella_leaves_200754_2

This was one of those surprise photos that you get every once in a while.  She’s not looking at the camera but you can tell she is deep in thought about something.  Definitely will be scrapping this one soon. 

Bella_close_up_face

And would you believe….I took 96 photos of this whole leaf experience?  96, I think I’ve lost my mind!  LOL

The Last of the Pumpkin Patch :(

This is the last year that our pumpkin patch will be around.  Sadly they sold out to big business and they’ll probably put a Super Target or Walmart on the property…just what we need right?  Anyway, we took Bella yesterday and she rode a pony and pet the goats and picked out a pumpkin, got some good picks so hopefully I can scrap them soon! 

Dsc_0015

Dsc_0024

Dsc_0026

And this is the Charlie Brown pumpkin that Bella so kindly rescued from her trip to the Pumpkin Patch with her school.  I asked her why she picked out that one and she said "Cuz it had this weird thing on it!" LOL

Dsc_0014

And it’s complete with a butt crack!
Dsc_0015_2

And finally I leave you with this years spooky "faux" gingerbread house(s).  I decided to make 2 this year.  I found the witch at Joann’s and thought it would be cute on top but the cat also thinks so.  I keep finding it on the floor!  I had all intentions to make doors and windows on this but just decided that it was fine and to move on to other things! 

Dsc_0030